Introduction: Curve Attractor Grasshopper Explained
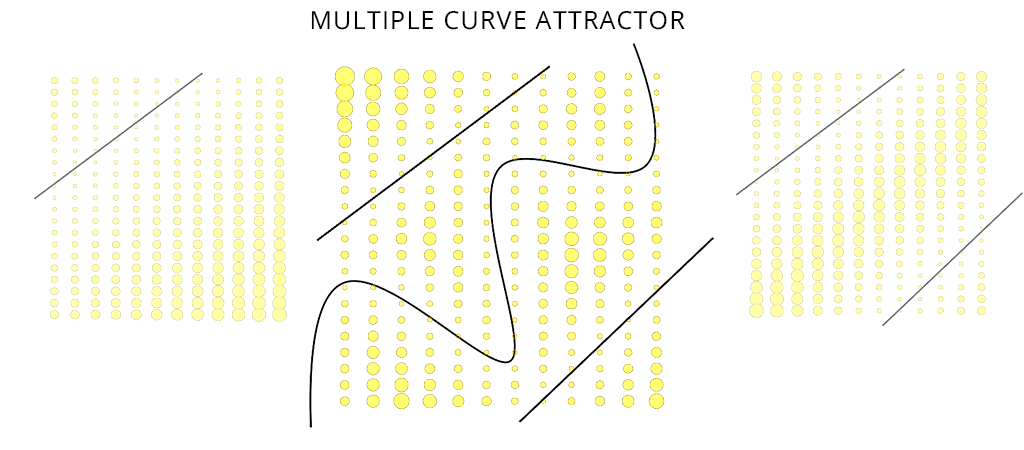
Today, we’re building something that looks complex but is surprisingly simple: a dynamic grid of circles that grows and shrinks as if they’re being pulled by invisible magnets.
This curve attractor grasshopper tutorial will help you understand how to control geometry using distance-based relationships in parametric design.
Here’s the plan:
We’ll start with a simple grid.
We’ll draw a few freehand curves.
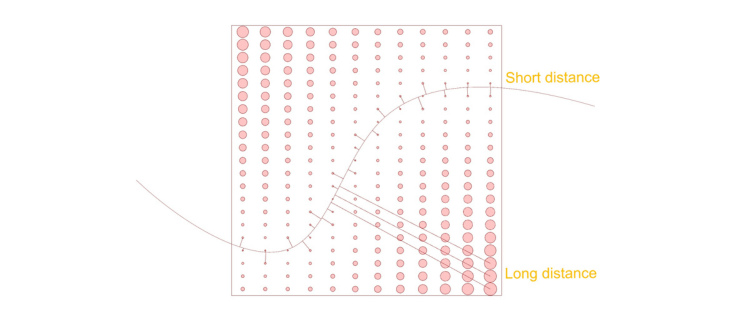
By the end, those circles will scale in real-time based on how close they are to your curves. Move a curve, and the pattern instantly ripples and shifts.
What is a Curve Attractor in Grasshopper?
Before we jump into the Grasshopper canvas, let’s quickly understand how this effect actually works. Don’t worry—it’s simpler than it sounds.
Core Idea
We have a grid of circles. Each circle sits at a specific point.
We draw one or more curves nearby.
For every circle, we ask:
“How far is your center point from the nearest curve?”
That distance becomes our control knob in this grasshopper curve attractor system.
How Curve Attractor Works in Grasshopper
Once we have that number—the distance—we can do almost anything with it:
- Scale the circles (close = big, far = small, or vice versa)
- Rotate them
- Extrude them into 3D forms
- Change their color
The magic is in the mapping: we take a raw distance (say, 4.2 units) and convert it into a transformation value (say, a scale factor of 0.8). That’s what creates the smooth, organic gradient across the grid in parametric design grasshopper workflows.
Curve Attractor Grasshopper: Step-by-Step Breakdown
- Step 1: Create the field of objects (our grid of circles)
- Step 2: Place Circles and Set Up the Transformation (scaling, rotation, etc.)
- Step 3: Calculate Distance to the Nearest Curve
- Step 4: Remap Distances to Scale Factors
That’s the whole game plan.
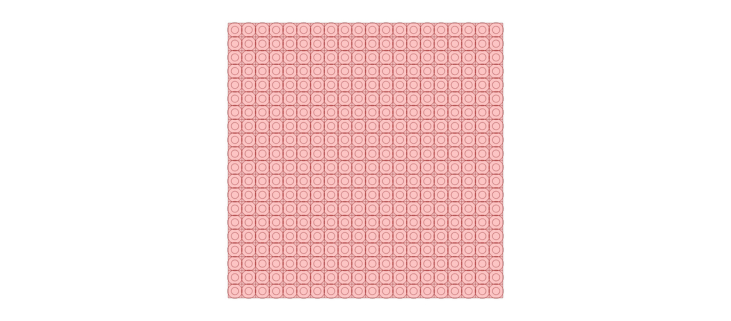
Step 1: Creating a Grid of Points in Grasshopper
We’ll start by building a base surface, dividing it into smaller cells, and extracting the center point of each one.
Components
Rectangle / Boundary Surfaces / Divide Domain² / Isotrim / Area
The Process
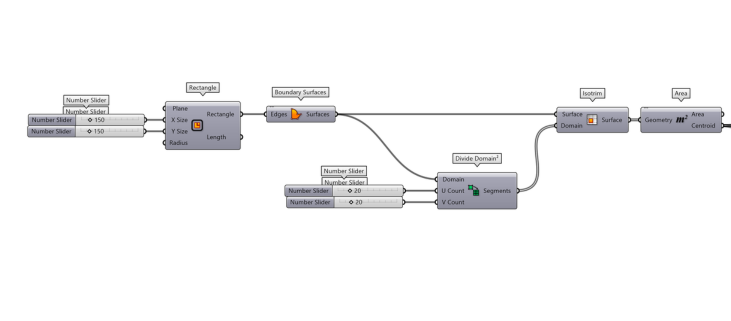
Draw a Rectangle – Set your desired width and length using two Number Sliders.
Make it a Surface – Plug the Rectangle into Boundary Surfaces.
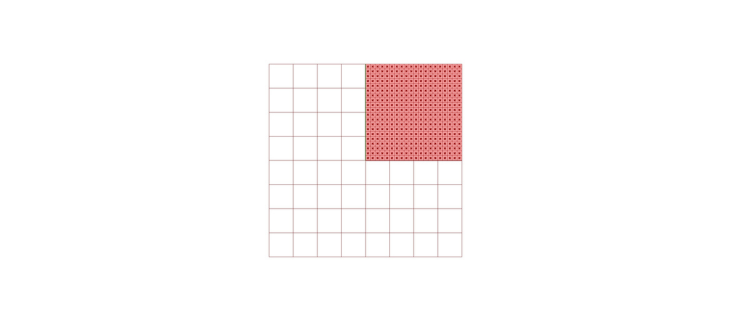
Divide the Surface – Use Divide Domain² with U and V sliders to set your grid count (e.g., 20 columns, 20 rows). Connect the surface to Isotrim along with the divided domain. This gives you a set of smaller surface panels.
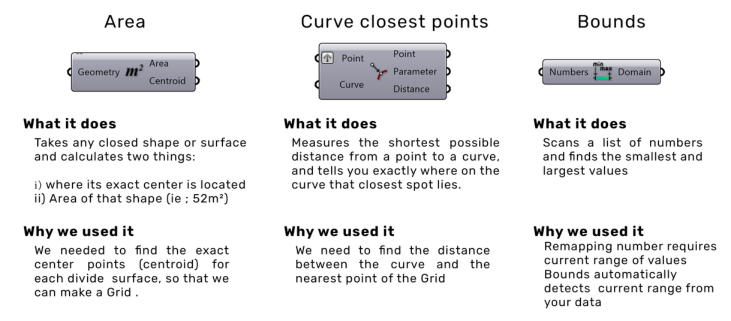
Get Center Points – Connect the Isotrim output to Area. The Centroid (C) output is your grid of points.
Step 2: Place Circles and Set Up the Transformation
Now that we have our grid of points, let’s place a circle at each one and prepare them to be scaled.
Components
Circle / Scale
The Process
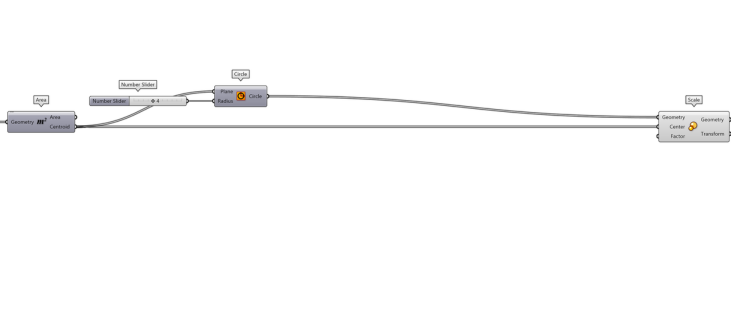
- Create Circles – Add a Circle component. Plug your grid points into the P (Plane) input. Use a Number Slider to set a base Radius for all circles.
- Set Up Scaling – Add a Scale component.
- Connect the Circle (C) output to the G (Geometry) input.
- Connect your grid points to the C (Center) input. This ensures each circle scales around its own center point.
- Leave the Factor Open – The F (Factor) input is where the magic happens later. For now, you can plug in a default value like 1 to see the circles at their original size.
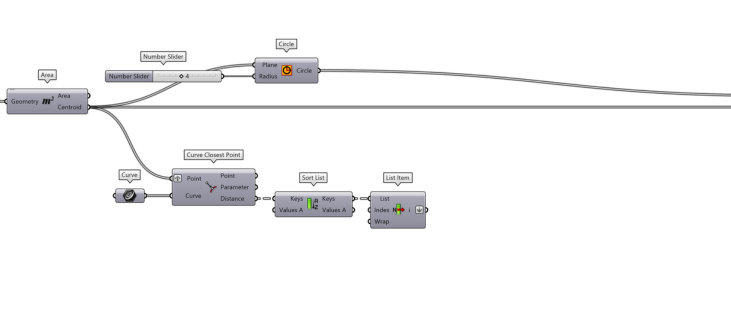
Step 3: Calculate Distance to the Nearest Curve in Grasshopper
Now we find out how far each grid point is from the curves we draw. This is the core of the curve attractor grasshopper logic.
Components
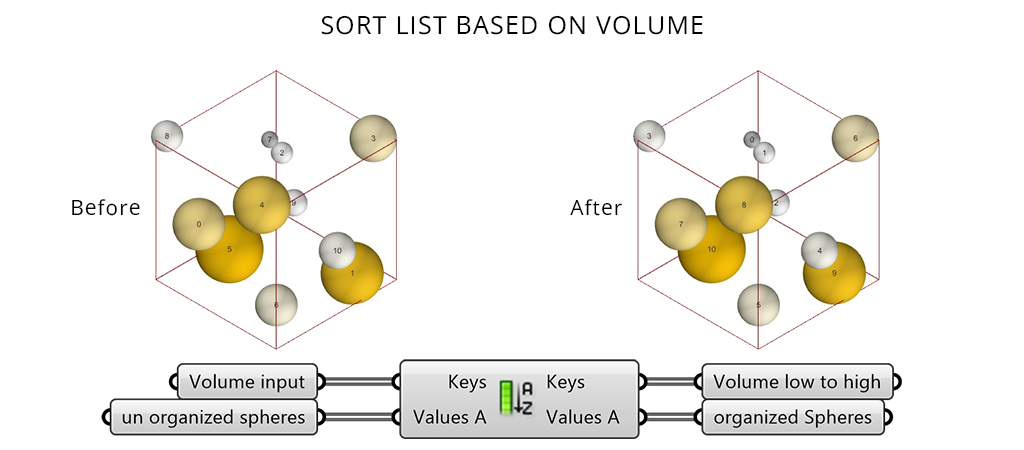
Curve Closest Point / Sort List / List Item
The Process
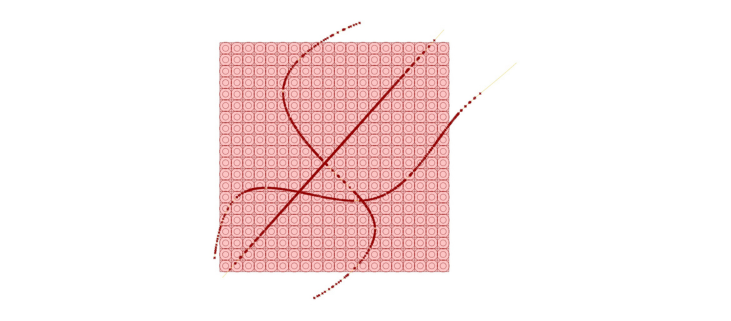
Draw Your Curves – In Rhino, draw a few freeform curves that cross through your grid area. Add a Curve param to the canvas, right-click it, and select Set Multiple Curves. Pick your curves.
Find Closest Points – Add a Curve Closest Point component.
Connect your Curve param to the C (Curve) input.
Connect your grid points to the P (Point) input.Important: Right-click the P (Point) input and select Graft. This ensures each point checks against all curves independently.
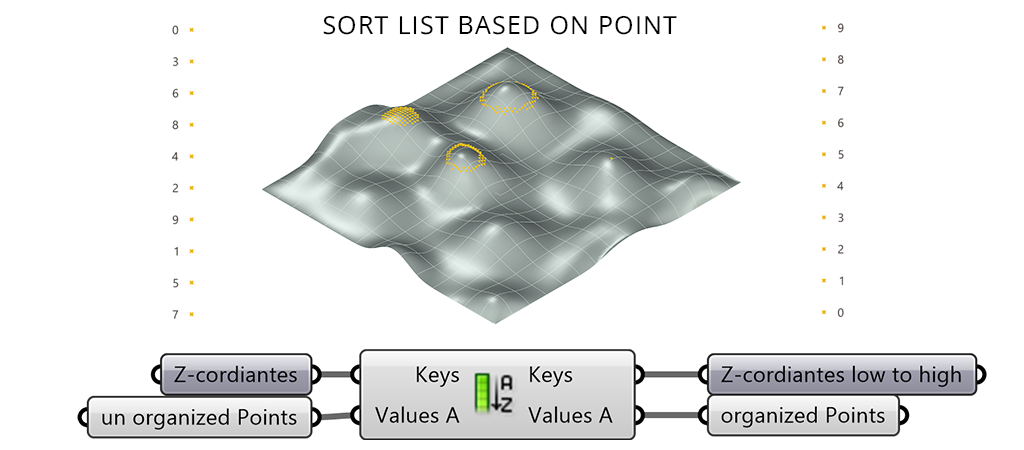
Extract the Shortest Distance –
Add a Sort List component. Connect the D (Distance) output to K (Keys).
Add a List Item component. Connect Sort List (A) output to List Item (L).
Right-click the List Item output and select Flatten.
Step 4: Remap Distances to Scale Factors (Curve Attractor Grasshopper)
We now have a list of distances. These are raw numbers—we need to convert them into scale factors.
Components
Bounds / Construct Domain / Remap Numbers
The Process
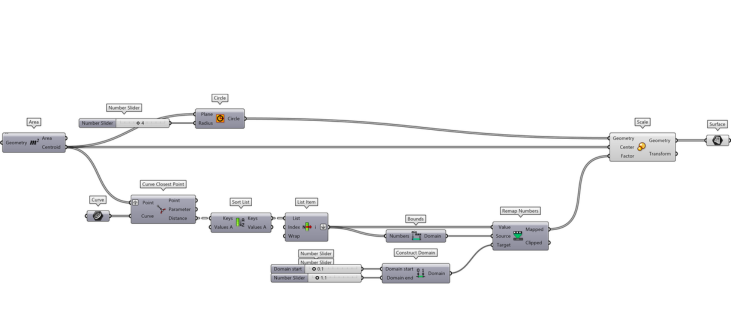
Find the Range – Add a Bounds component. Connect your flattened List Item output to V (Values).
Create the Target Range – Add a Construct Domain component.
Connect sliders for minimum and maximum scale values.Remap the Values – Add a Remap Numbers component.
Connect:- Distances → V (Value)
- Bounds → S (Source)
- Construct Domain → T (Target)
Drive the Scale Factor – Connect the Remap Numbers (R) output to the Scale (F) input.
Optional Step: Convert to Surfaces
If you want planar surfaces instead of curve circles, add a Boundary Surfaces component. Connect the Scale (G) output to the B (Boundary) input.
Now each circle becomes a surface you can extrude, color, or bake.
What Happens in This Curve Attractor Grasshopper Script
The circle closest to any curve gets the maximum scale.
The farthest away gets the minimum.Everything in between transitions smoothly. Move your curves in Rhino and watch the grid respond live.
Component Breakdown: What's Actually Happening Inside?
These three workhorses do the heavy lifting in this script. Here’s what each one is doing under the hood.
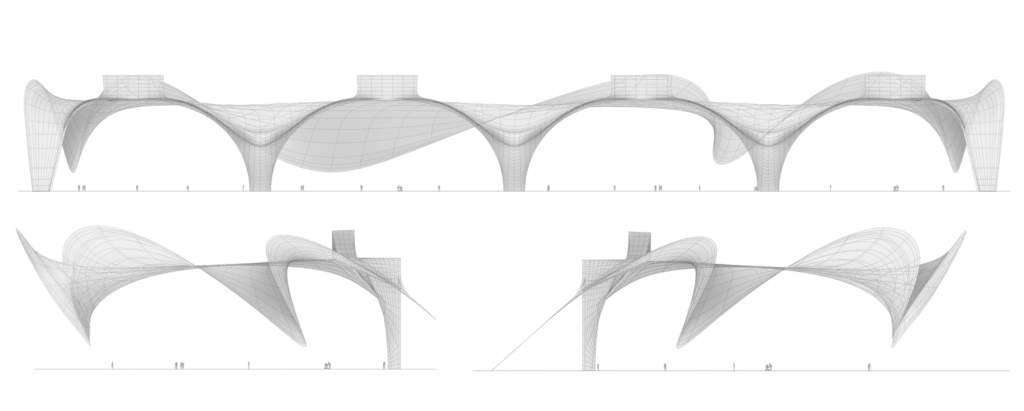
Real world Project
Recent Project