What is image sampler
The Image Sampler in Grasshopper is a component that allows you to extract data from an image and use it to drive your design. Instead of manually defining values, you can use the colors or brightness levels of an image as input parameters within your workflow.
This makes it possible to translate visual information—such as gradients, textures, or patterns—into parametric control. Whether you’re developing a façade system or generating landscape forms, the Image Sampler helps bridge the gap between visual inspiration and computational design, enabling more intuitive and expressive outcomes.
How to Import an Image into the Image Sampler In Grasshopper
- Place the Image Sampler component onto the Grasshopper canvas
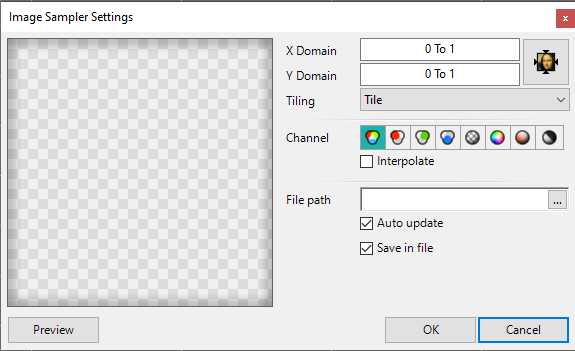
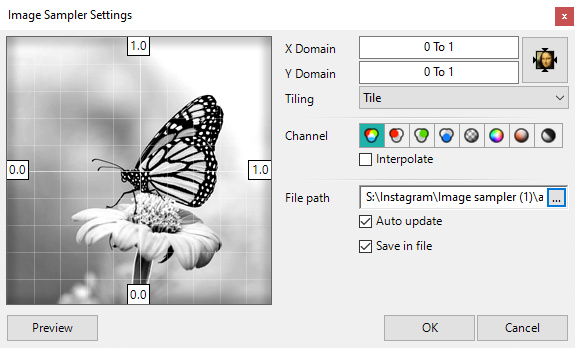
- Double-click the component to open the Image Sampler Settings
- Click the three dots next to File Path to browse and select your image
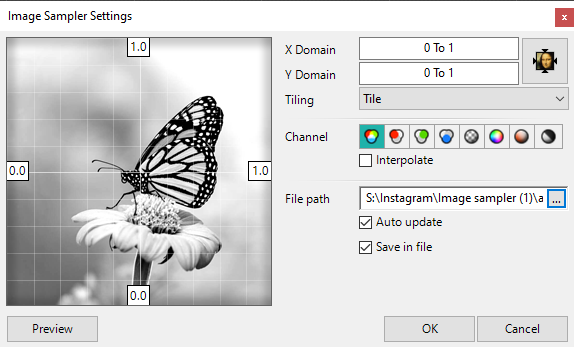
Once the image is loaded, it will be displayed in the preview panel within the Image Sampler Settings window.
How image sampler works
For example, if your image is 100 × 100 pixels and you try to sample a point at (0, 300), that point lies outside the image. In other words, it’s out of bounds, so the sampler won’t return meaningful data.
To achieve a clear and detailed result, it’s important to use a higher number of sample points—similar to increasing the resolution of an image. The more points you sample, the closer your design will match the original image.
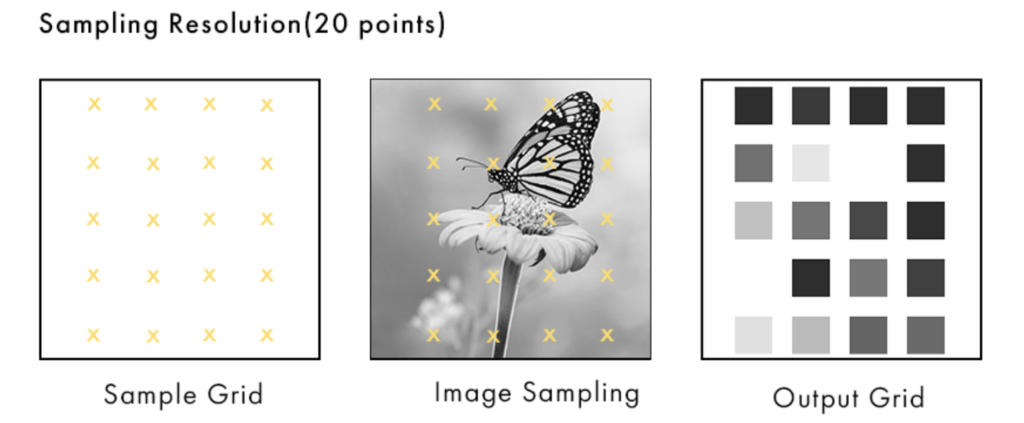
A common approach is to distribute these points evenly by creating a grid across the image. This can be done in different ways, such as subdividing a surface or generating a structured set of points.
Before getting into those methods, let’s first understand what kind of output the Image Sampler provides.
Channel Settings – Understanding the Image Sampler’s Outputs
Every color in an image is made up of three components: Red, Green, and Blue (RGB). When you sample using the full RGB option, the Image Sampler returns all three values for each point—representing the exact color at that location. This is especially useful when you want to apply image-based colors directly to your geometry.
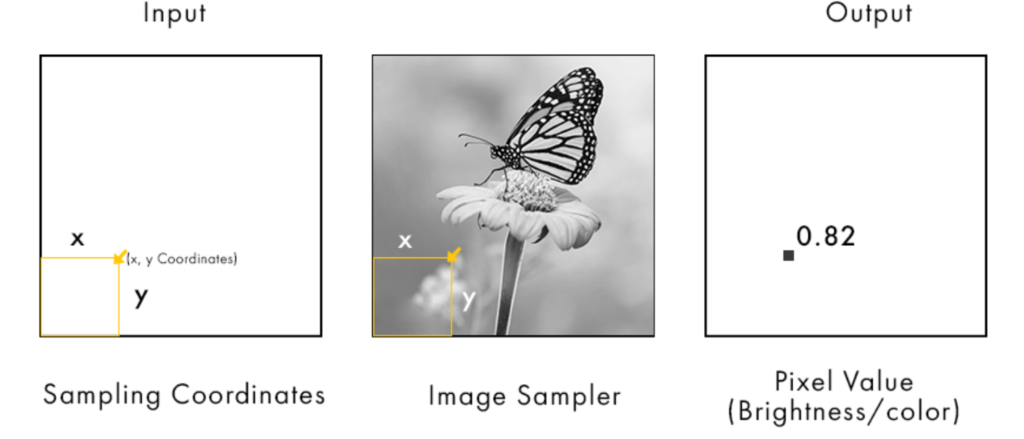
For example, the Brightness channel converts the sampled pixel into a value between 0 and 1, where 0 represents black and 1 represents white. This is commonly used to control parameters like height, scale, or density in a design.
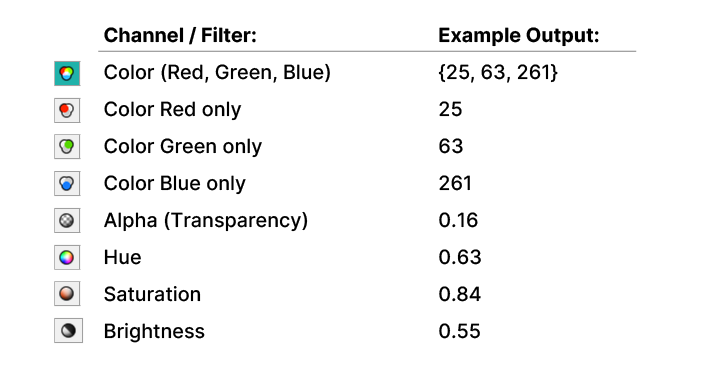
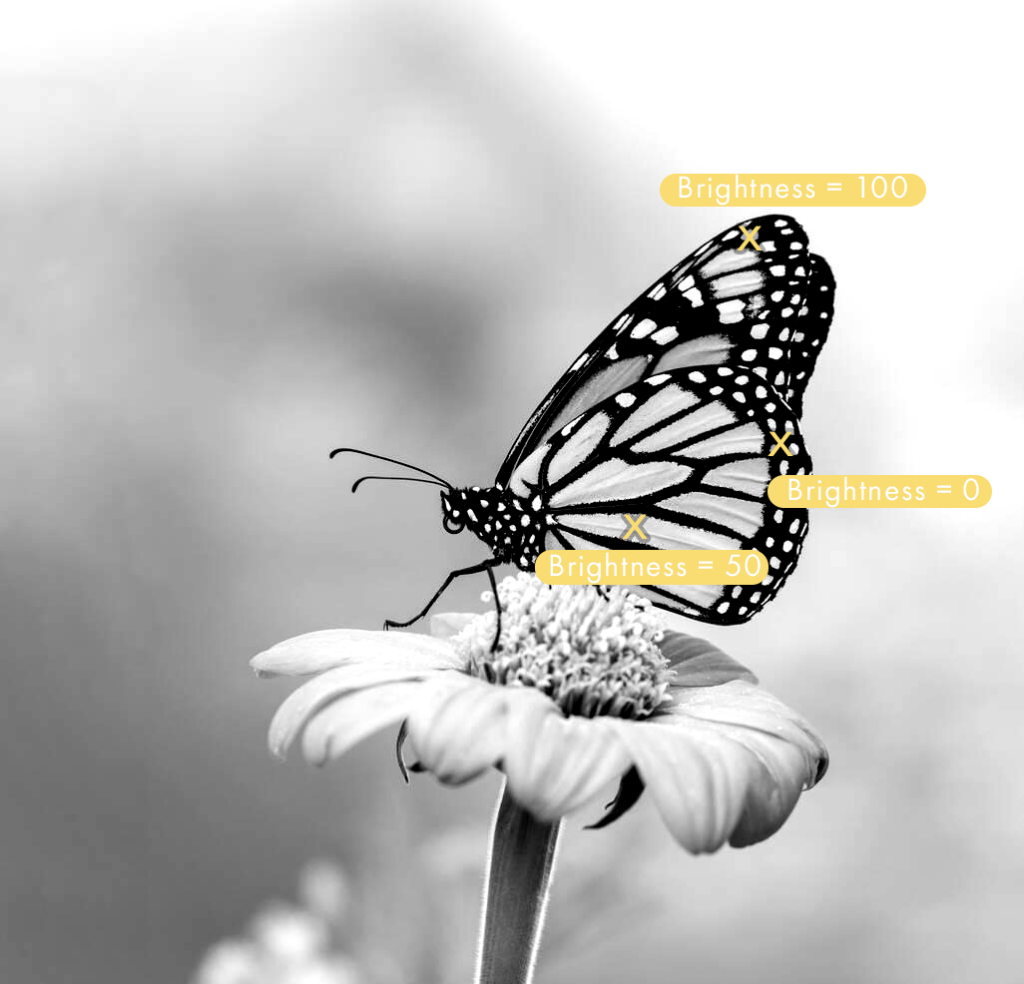
For instance, a mid-gray tone would have a value around 0.5.
Understanding the Image Domains
In the Image Sampler Settings window, the first two fields define the X and Y domains.

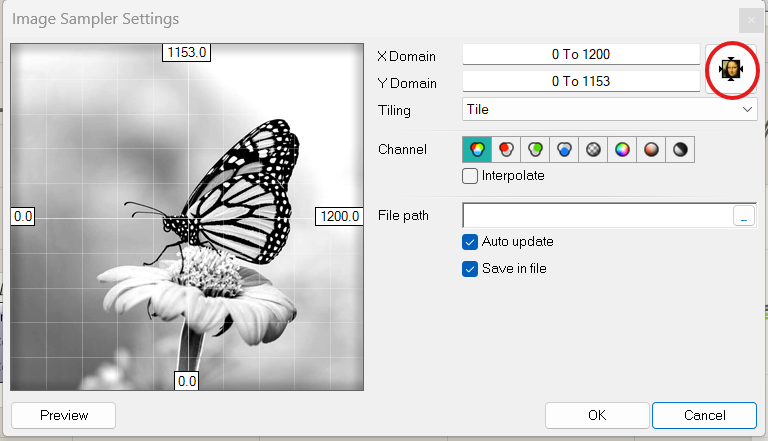
This can be done using the small icon next to the domain settings. When enabled, the domain reflects the image size—for instance, a 500 × 500 image will have domains ranging from 0 to 500 (or 1 to 500, depending on settings).
In this case, the domain is set to match the actual resolution of the image. The X domain ranges from 0 to 1200, and the Y domain from 0 to 1153, meaning coordinates directly correspond to pixel positions.
The values displayed around the preview indicate the minimum and maximum limits of these domains.
Regardless of how the domain is defined, it is important that the sample coordinates stay within the same range. Any values outside this domain will not return accurate results.
In most workflows, using a normalized domain of 0 to 1 keeps the system consistent and easier to manage.