This web application is designed for visualizing a 3D deck model intended for swimming pools, balconies, and backyards, offering modern features. We will review all features in detail. On the login page, users can sign in using their email and password. If a user is new, they can register by clicking either the sign-up button at the top or the “create one” link at the bottom of the login form, both of which lead to the registration page.
After logging into the application, you will see two options in the header: “View Saved Projects.” From this section, you can access a list of your saved projects, along with options to open, download, or delete each project. On the right side, there is a user icon that allows you to log out of the application, and you can also change your password from this option.
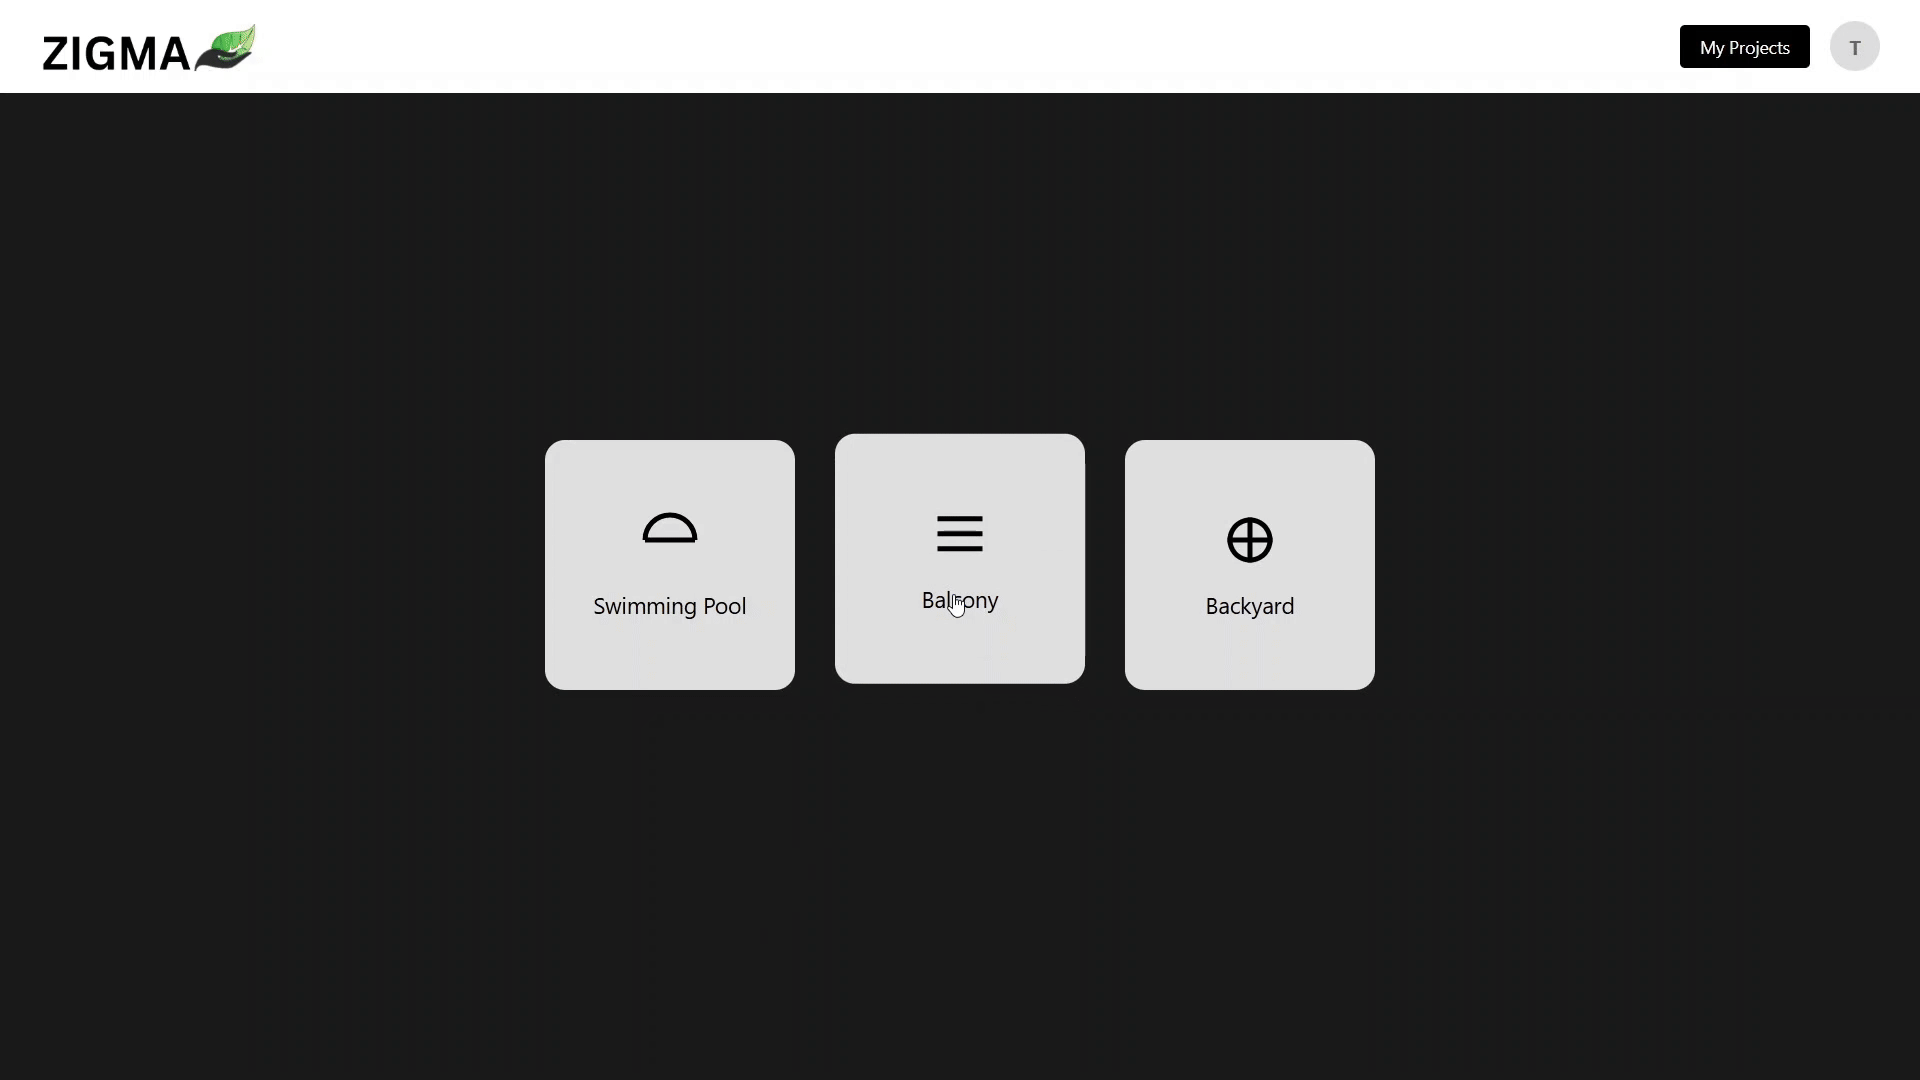
At the center of the screen, you’ll find three options: Swimming Pool, Balcony, and Backyard. We will start with the Swimming Pool.
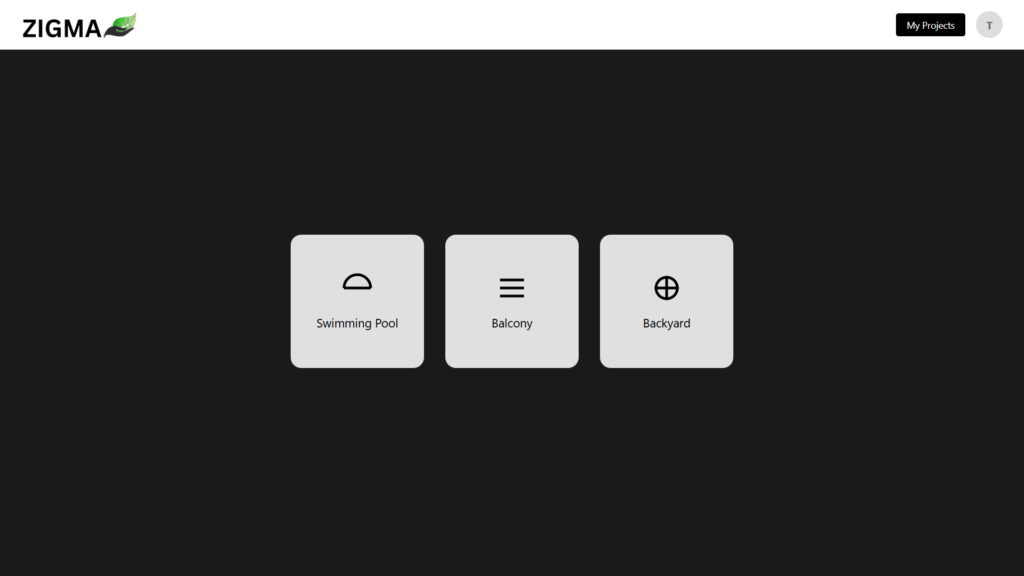
Swimming Pool
After clicking on the “Swimming Pool” option, a new page will open. In the center of this page, you will find an option labeled “CAD.” When you click on “CAD,” another page will appear asking you to upload a CAD file. After uploading the CAD file, it may take some time to process. Once it is ready, click on the “Next-Ready” button. This will open the 3D configurator, displaying your 3D model along with various features and options. We will discuss these features later.

Let’s discuss the Balcony and Backyard options. When you click on either of these selections, a new page will open with two options: “Draw” and “CAD.” The CAD feature functions similarly to the swimming pool option. In the “Draw” section, an interface will appear that includes a modal explaining how to create a polygon that will be converted into a 3D model.
Balcony
As you draw lines, reference lines will display the length of each segment. One helpful feature allows you to draw polylines to an exact length. To use this feature, simply press the “space bar.” An input box will pop up for you to enter the desired length of the polyline. After entering the length, press the “shift” key to draw the polyline to the specified length; you only need to place the endpoint of the polyline.
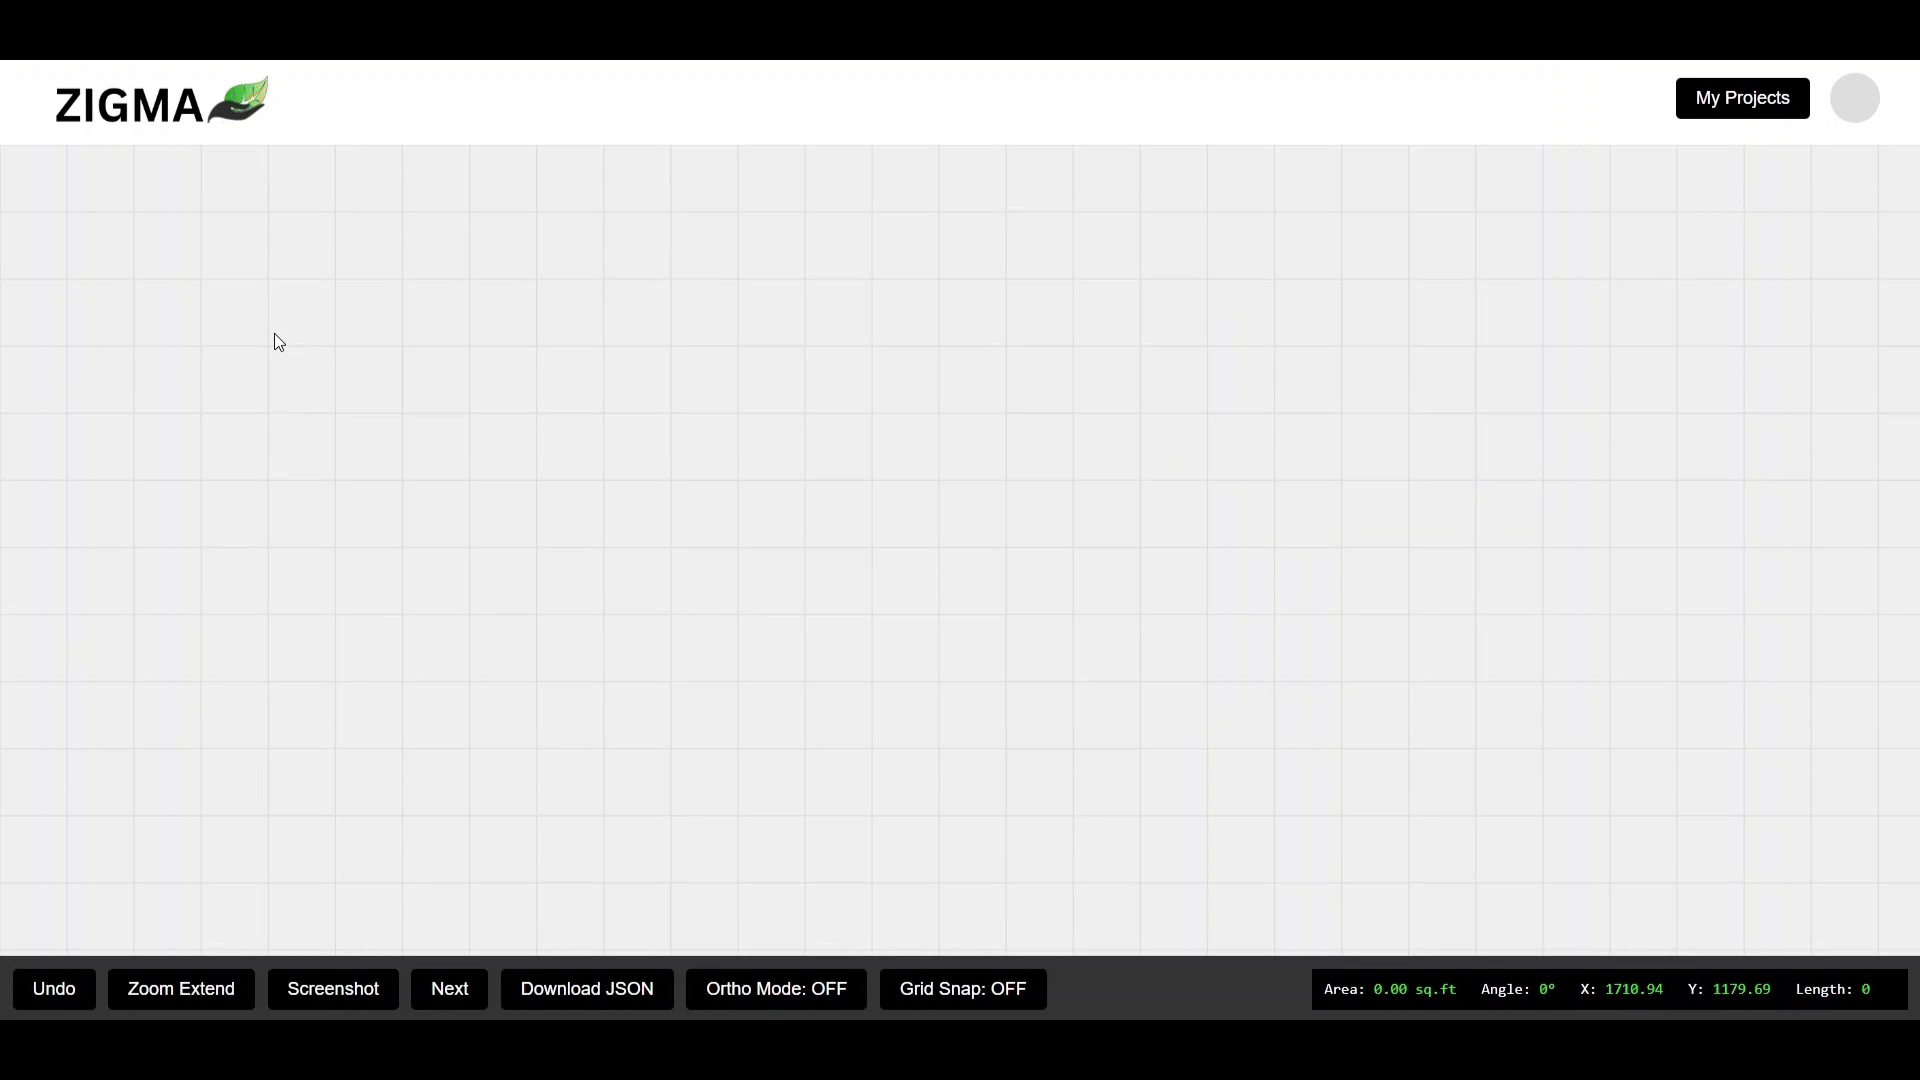
Once you have completed the polygon, you can hover over any polyline and click on it. This will bring up a new input box where you can enter a new length for that selected polyline. After entering the new length, press the “enter” key to apply the change.
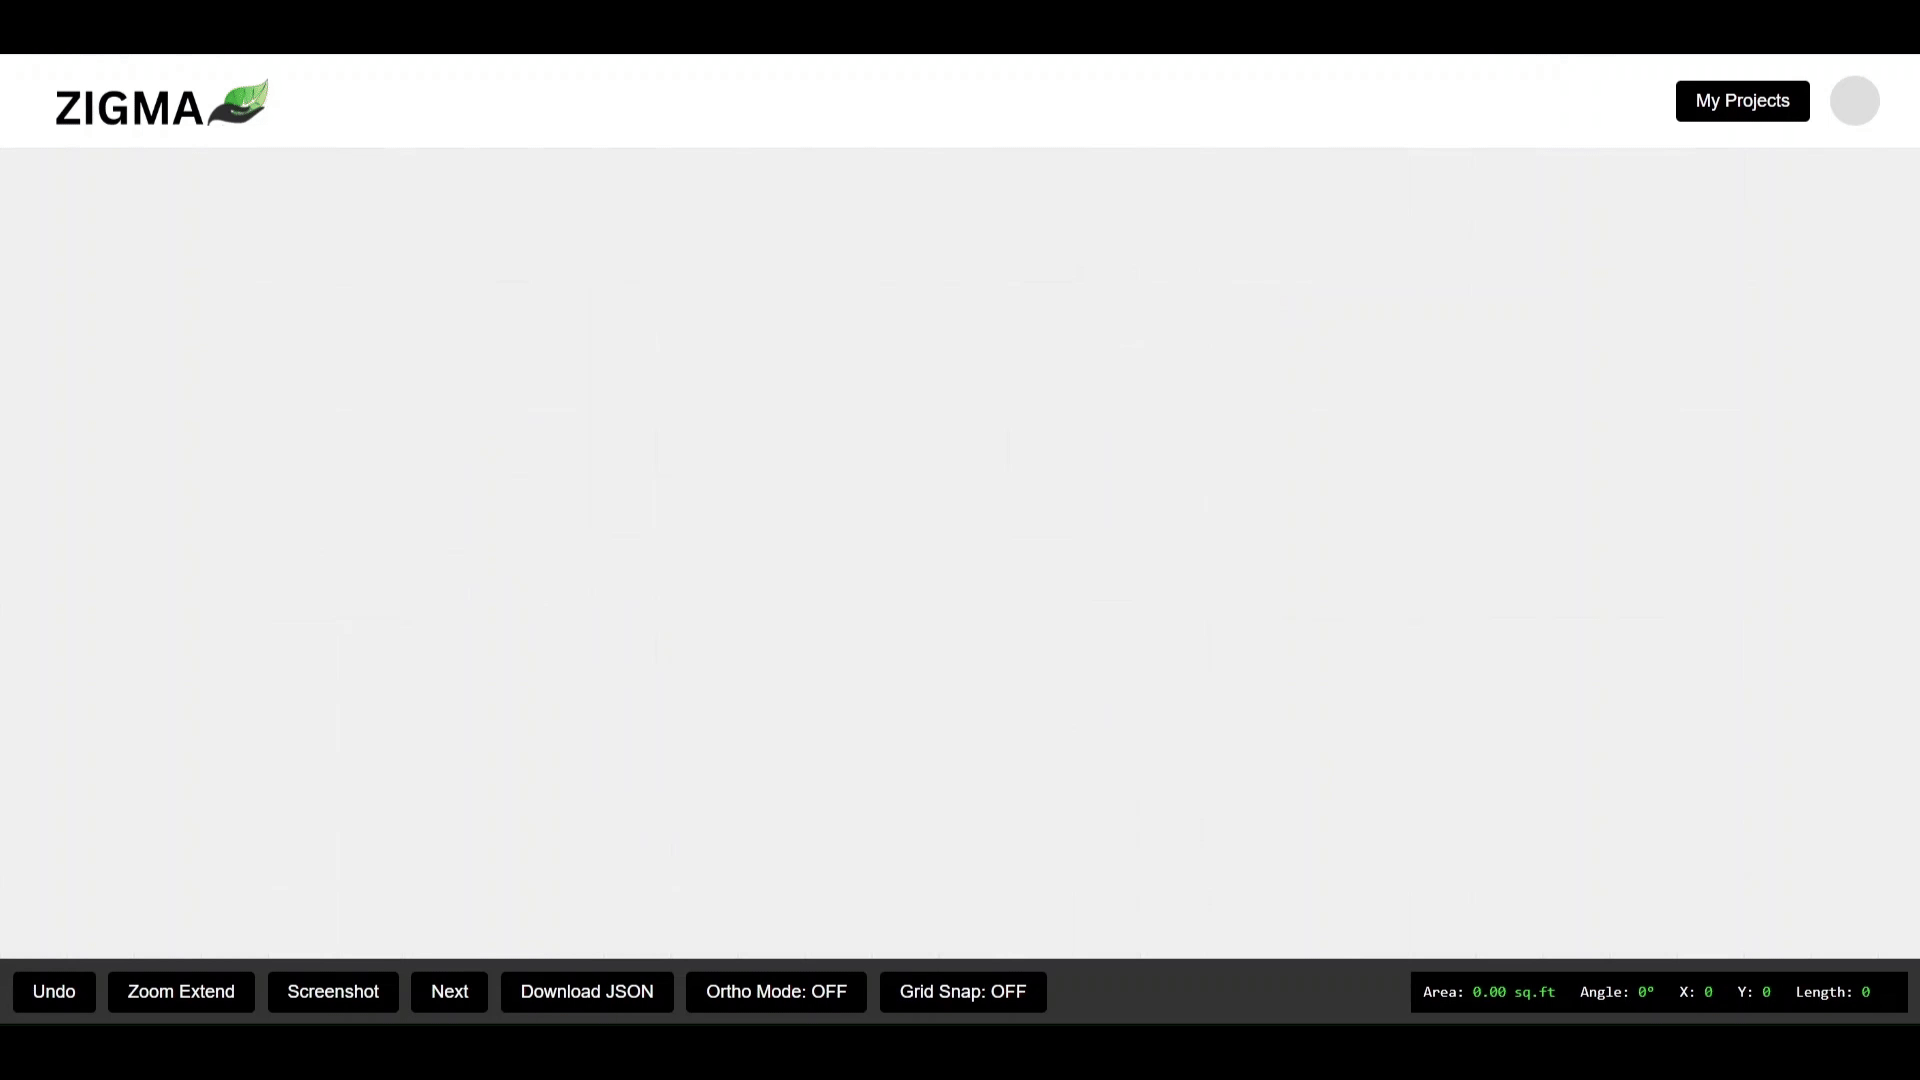
At the bottom of the interface, there are four buttons: “Undo,” “Download JSON,” “Ortho Mode,” “Grid Snap,” and “Next.” If you draw a line incorrectly, you can use the “Undo” button to reset it. The “Download JSON” button can be used once the polygon is complete, allowing you to download the JSON data of the polygon. The “Ortho Mode” button enables you to draw polylines only at 90-degree angles. The “Grid Snap” button assists you in drawing polygons aligned with the borders or corners of the visible grid.
Once the polygon is completed, click the next button to open the configurator, which will display a 3D model using this polygon for the deck.
Let’s discuss the configurator located in the center left corner. It features a toolbar with six options: “Zoom Extend,” “AR,” “Fullscreen,” “Screenshot,” “Perspective Camera,” and “Generate with AI.”
Starting with “Zoom Extend,” this option is used for placing the model on the screen, so you don’t have to repeatedly use the mouse scroller.
Next is the “AR” (Augmented Reality) feature, which allows you to see your model in the real world using your camera. To use this, simply scan the QR code displayed on the screen once you click the AR option.
The “Fullscreen” option allows you to view the model in full screen. The “Screenshot” option enables you to take a screenshot of the model.
The “Perspective Camera” provides various angles, such as top and bottom views, allowing you to see the model from different perspectives.
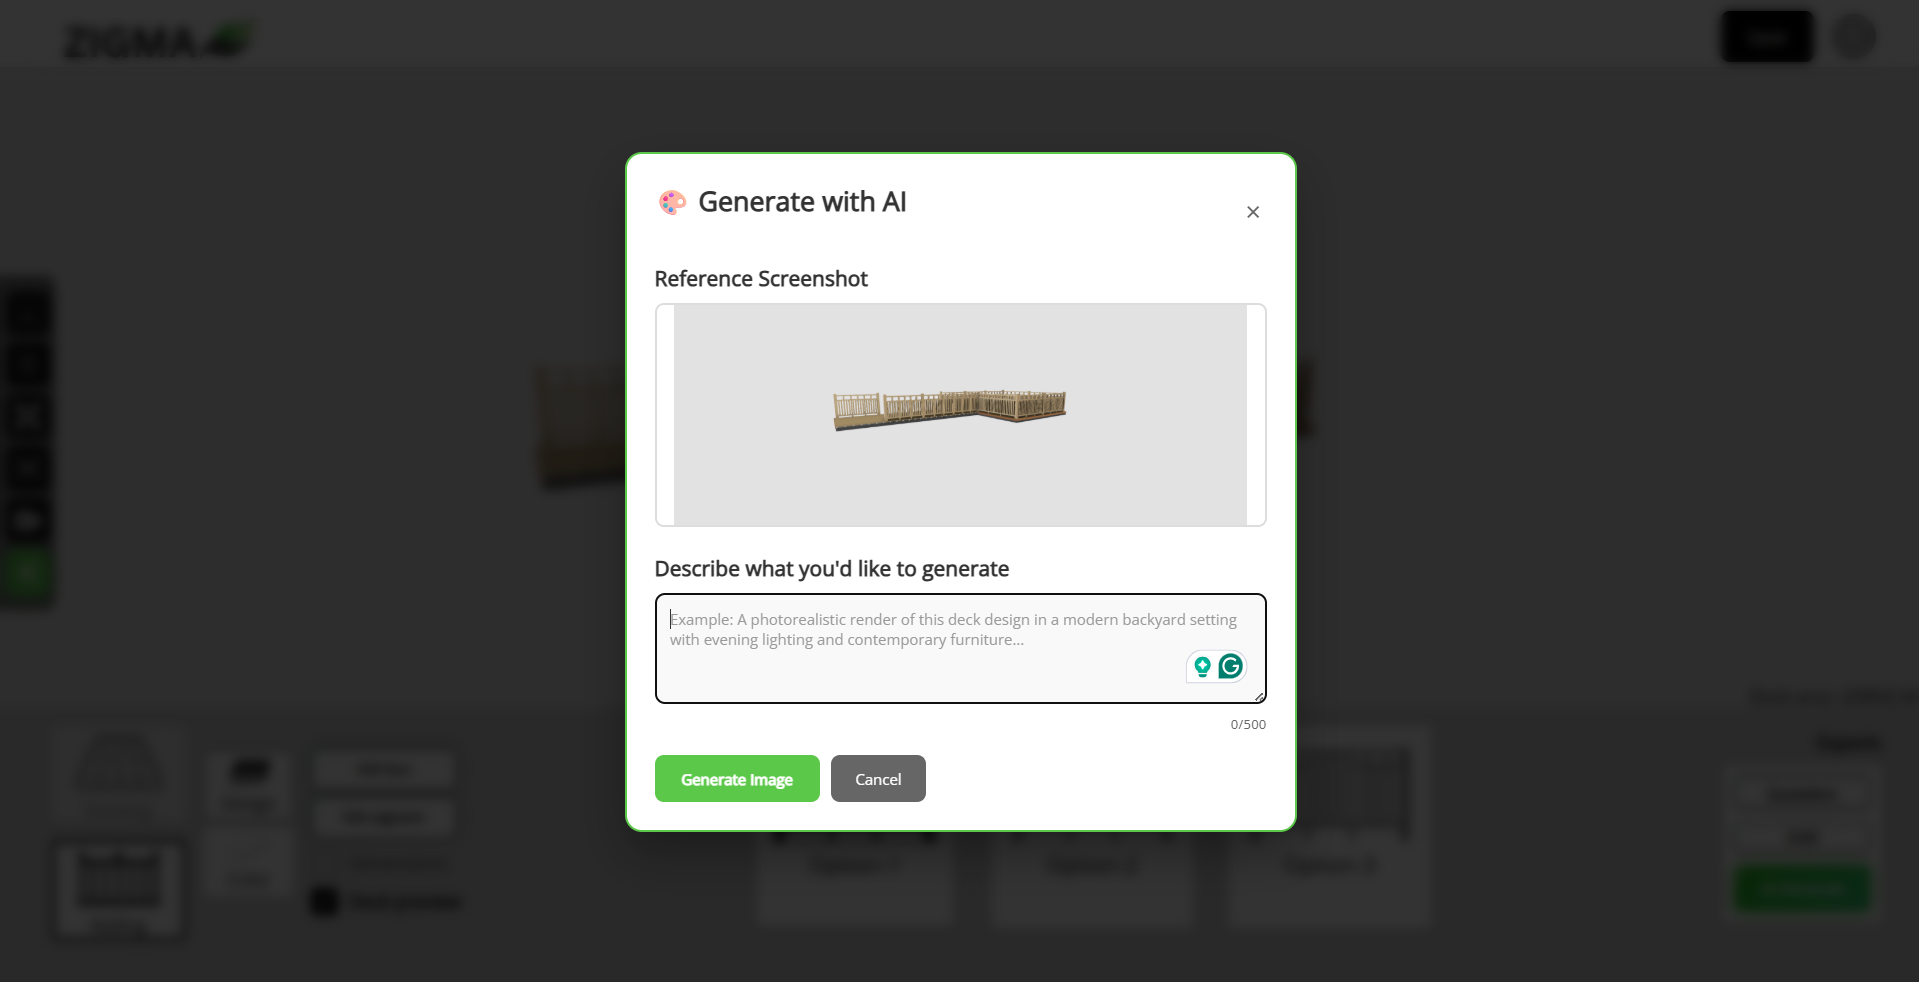
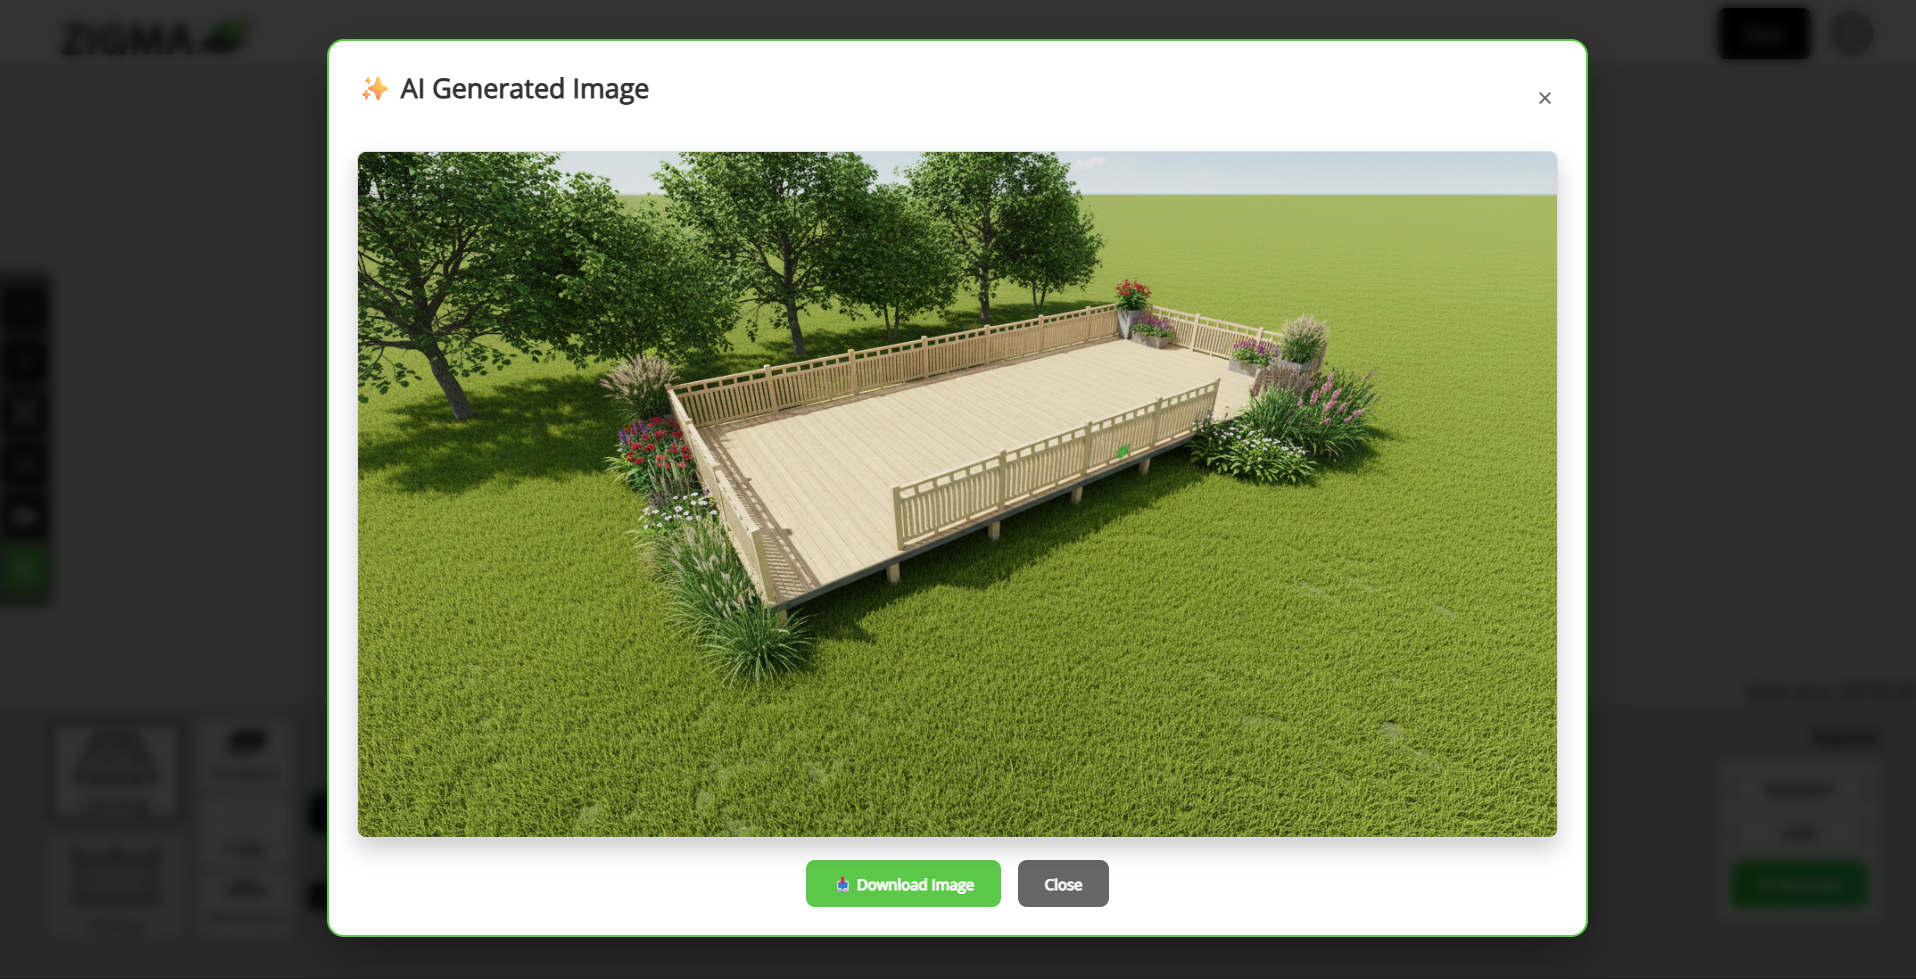
Finally, the “Generate with AI” option opens a modal where you can enter a prompt. When you click on this option, a screen will be displayed and upon entering a prompt, it will generate a new image using our model.
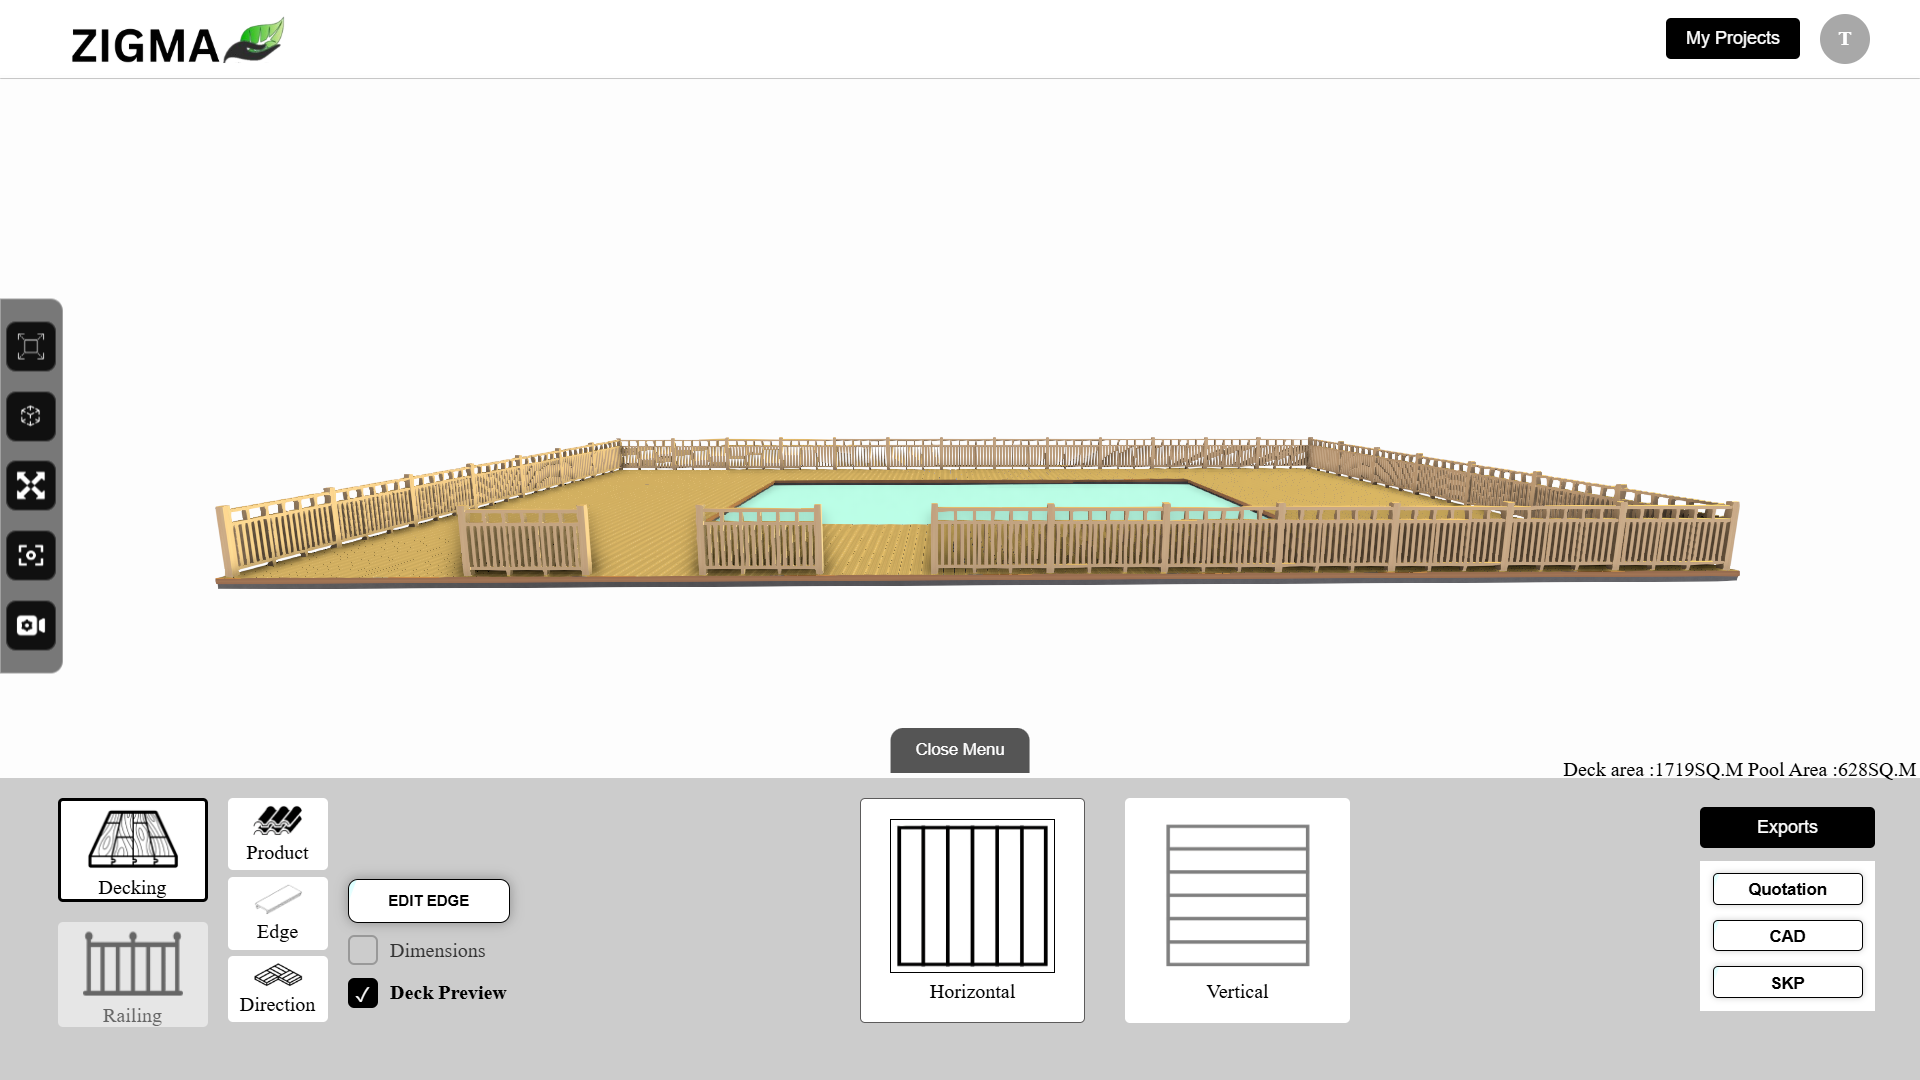
At the bottom of the screen, there’s a Menu button. When you click it, a menu section slides up from the bottom. This menu provides various features and options to edit your 3D model.
You can change the deck direction between vertical and horizontal, and view the deck dimensions by clicking on the “Dimensions” option. When the deck preview is turned off, the deck will be removed from the model view.
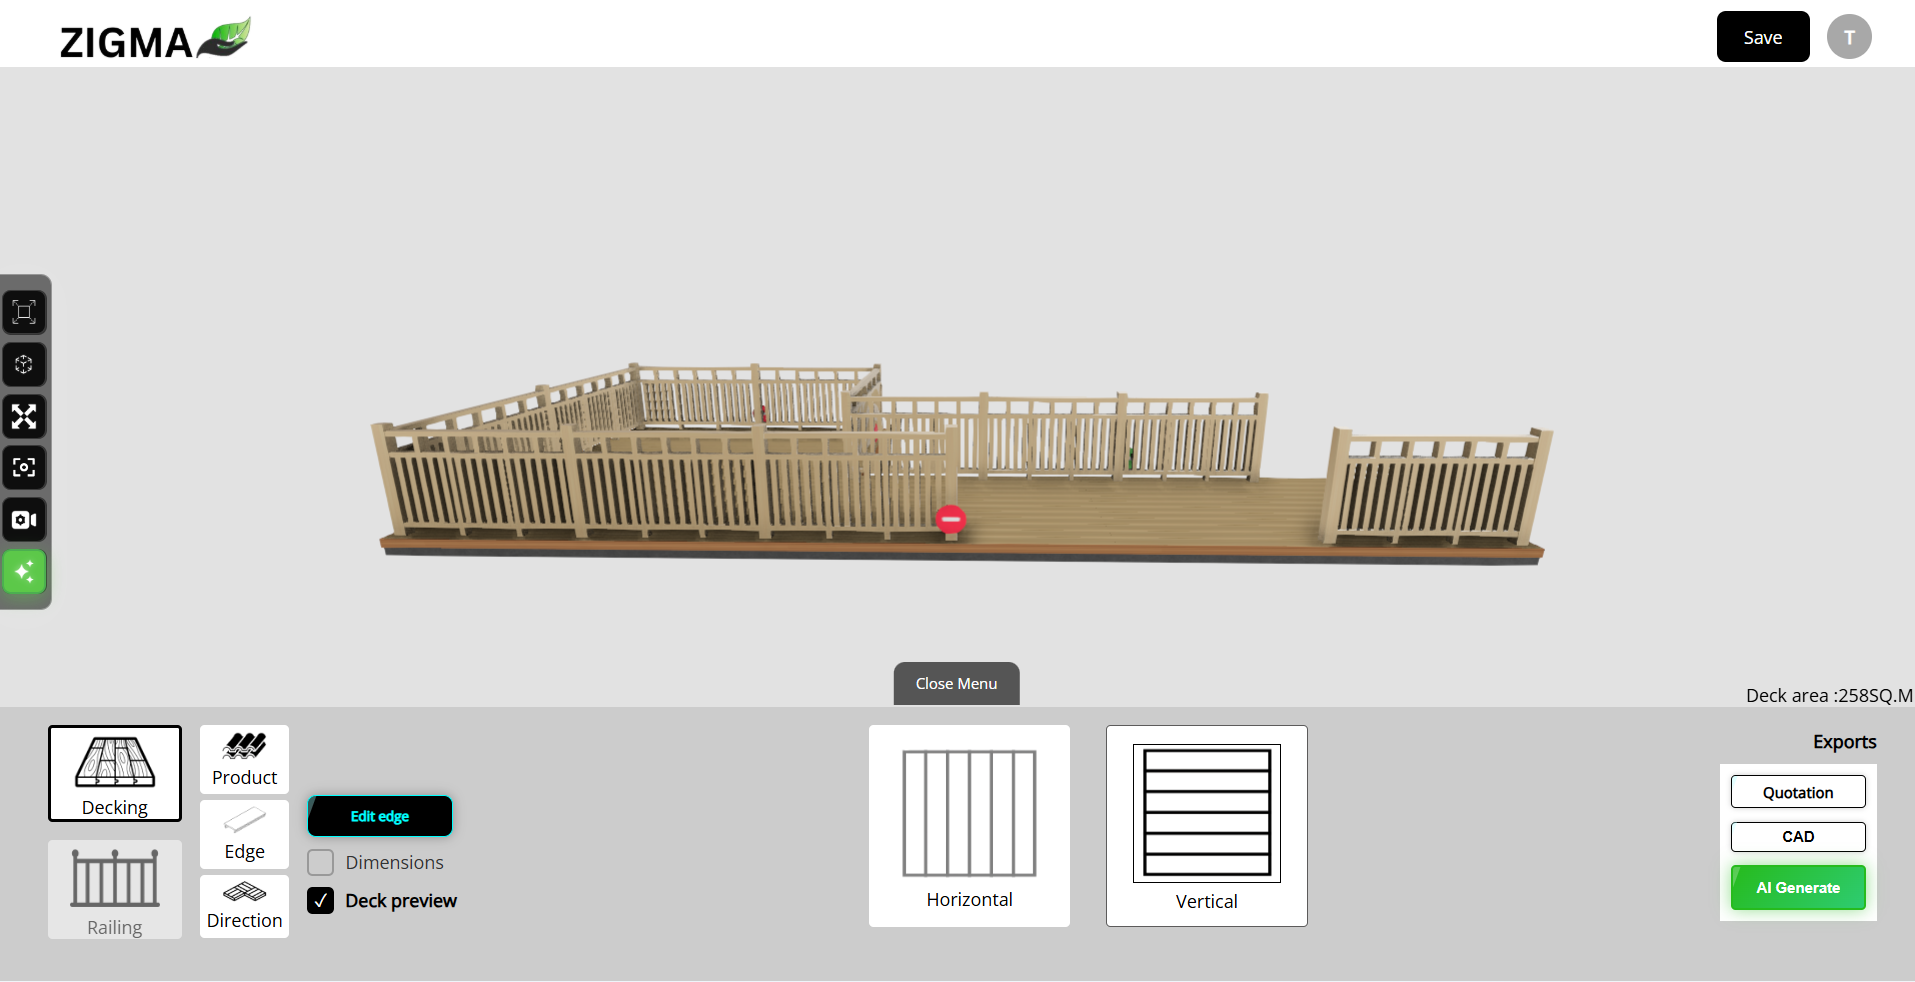
Under the Production section, you can change the deck profile, and similarly, under Edge, you can modify the edge profile. Clicking on these buttons opens a modal where you can make the changes.
The Edit Edge option allows you to add or remove edges on your 3D model. When selected, plus (+) and minus (–) buttons appear on the model, which you can use to modify the edges.
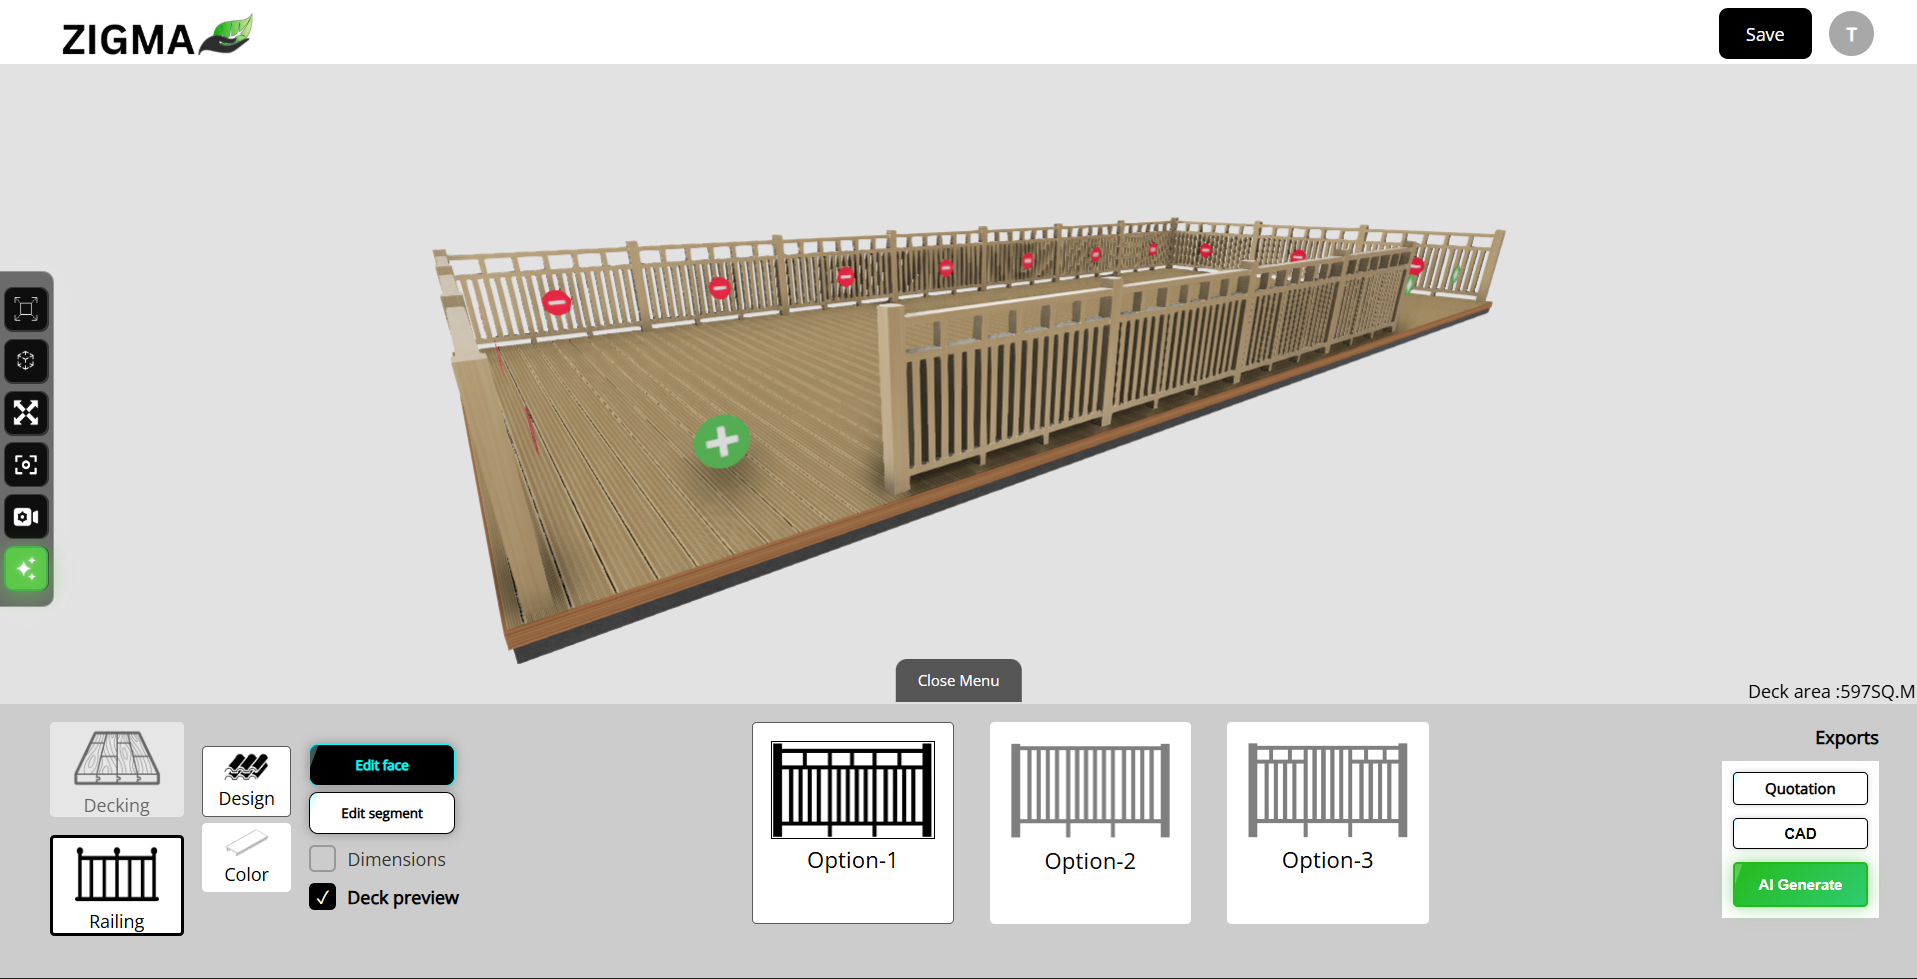
When you click on Railing, you’ll see three railing design options that let you change the railing style. The Color option allows you to customize the railing color.
There are also two other tools: Edit Face and Edit Segment. These work similarly to “Edit Edge,” allowing you to add or remove faces and segments from the railing. This entire interactive experience is part of the Web Interaction feature.
On the right side of the menu, you’ll find three buttons — Quotation, CAD, and AI Generate.
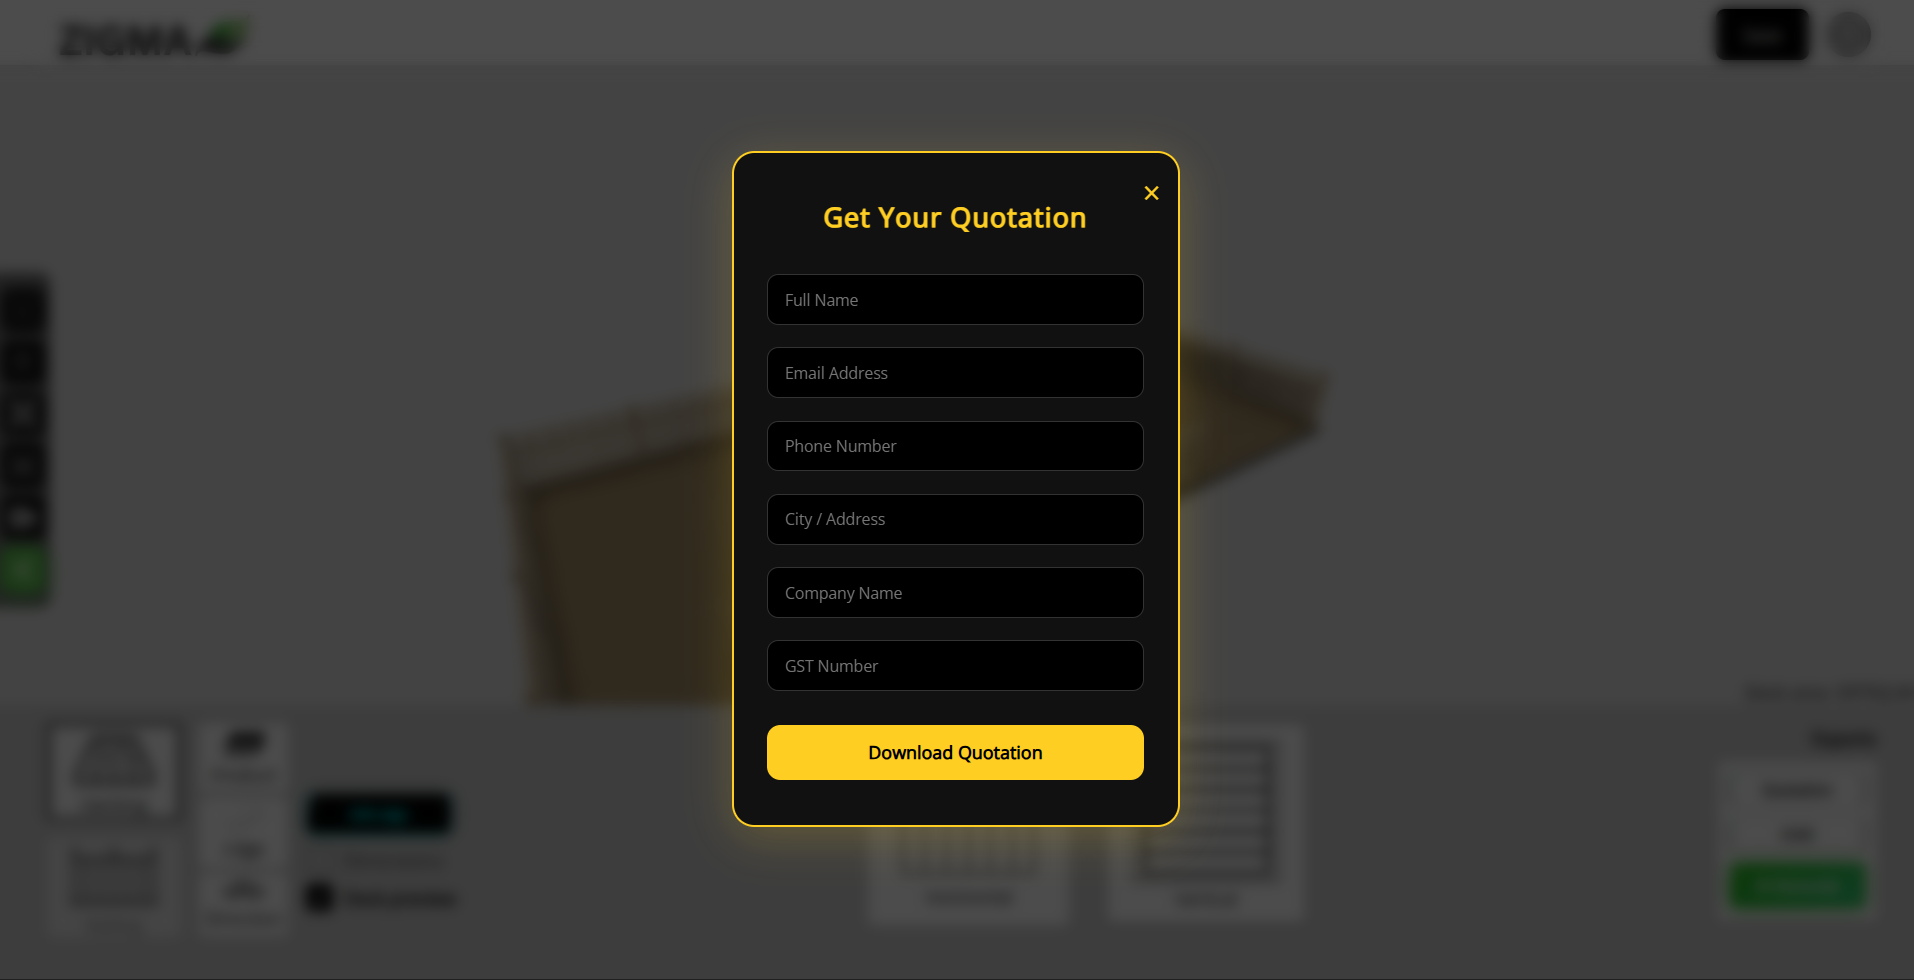
- Quotation: When clicked, a screenshot of your 3D model is captured and enhanced with AI. Then, a modal appears asking for your details — Name, Email, Phone, City, Company Name, and GST. Once filled out, you can click Download Quotation, which generates a detailed quotation including pricing, materials, total cost, date, invoice number, your personal details, an AI-enhanced image of the model, and its elevation view.
- CAD: This option downloads the CAD file of your 3D model.
- AI Generate: This feature works the same way as the “Generate with AI” option available in the toolbar.
In the header, there is a save button that will allow you to save the 3D model. When you click it, a prompt will ask for the name to save the file.