Users have two options for uploading their soffit designs: the first is by using a CAD file, and if they do not have a CAD file available, there is an alternative option where users can draw the dimensions of their room, and it will be converted into a 3D soffit design.This is the first page of the application where users can log in to their accounts if they are registered. If they are not registered, there is a button at the bottom of the form that they can click to register.
User can start registration with their name, email, password, and phone number. After that, they can log in to this web application.

After logging in, there are three options:
- Upload CAD
- Draw Custom
- Templates
UPLOAD CAD

In the first option, users can upload their CAD file to the configurator and set the height of the room.
DRAW CUSTOM
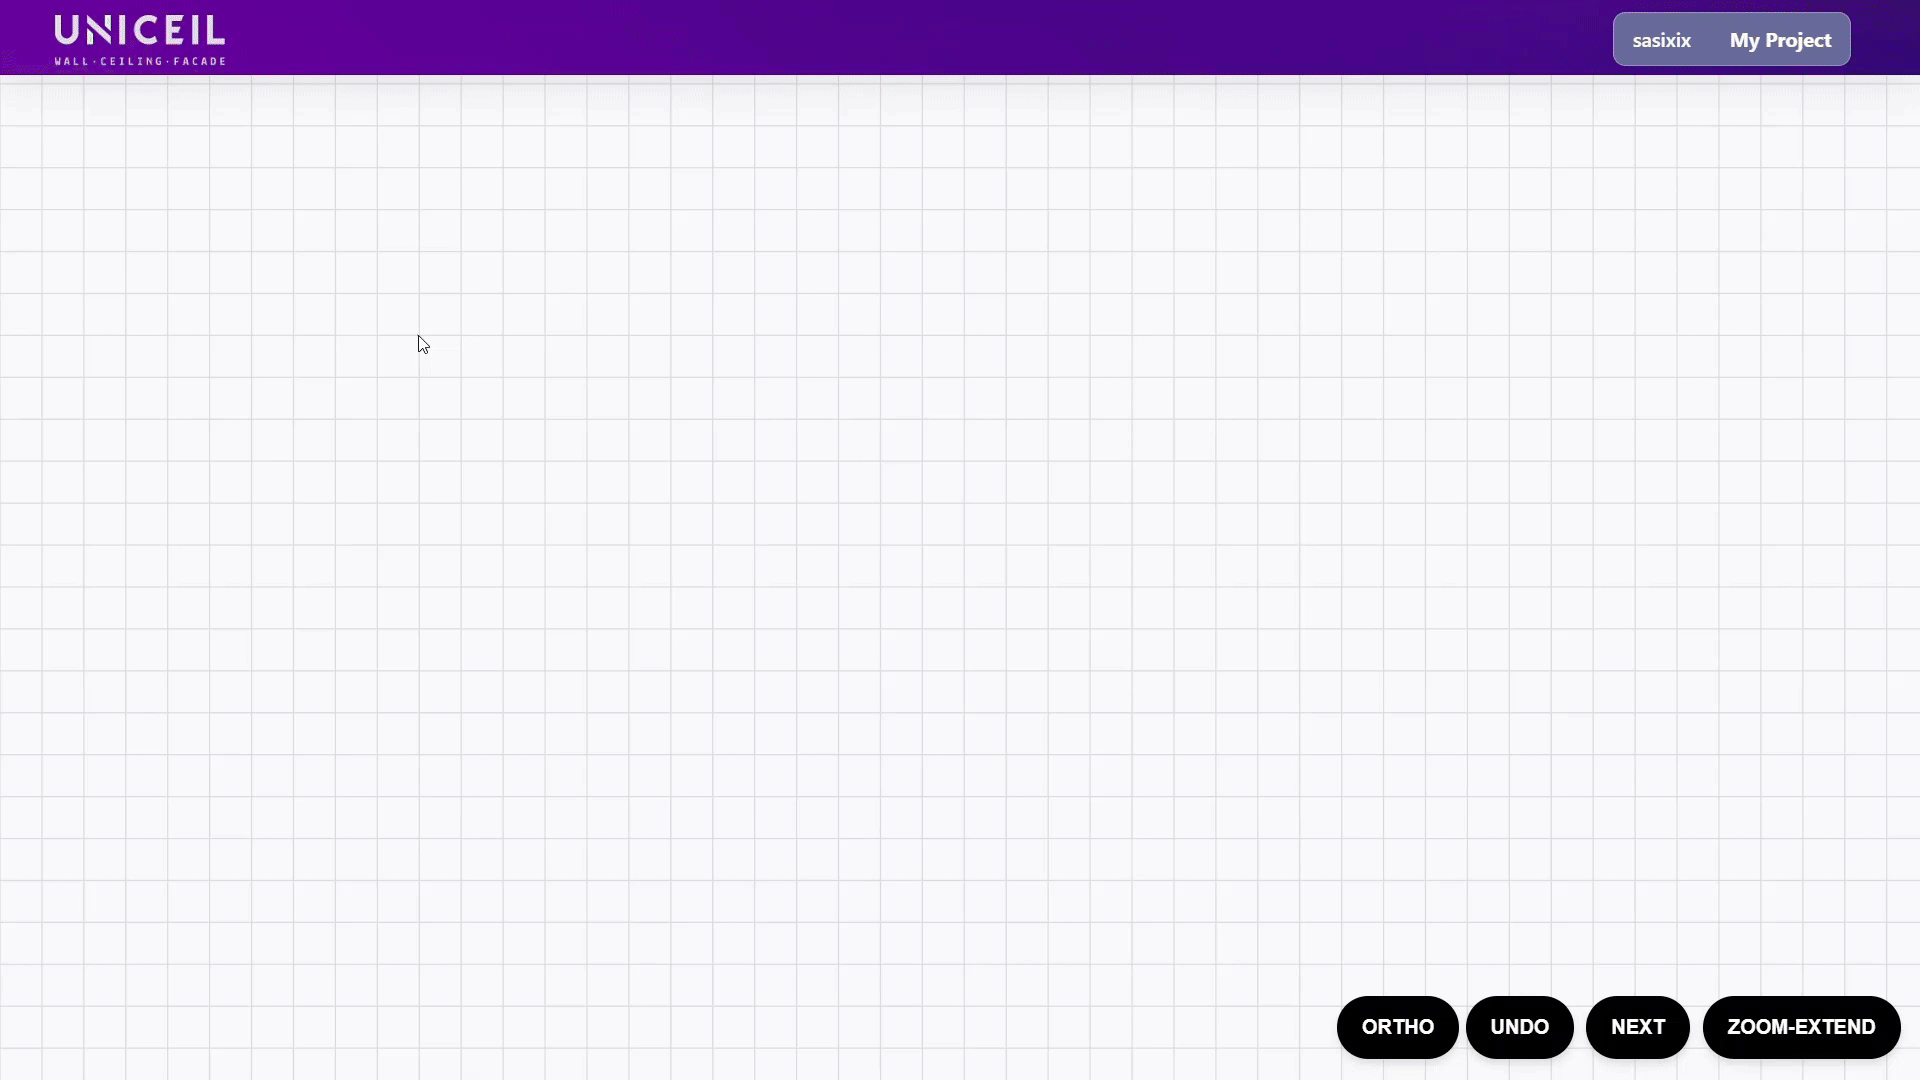
This feature allows users to draw custom polygons using polylines.
There are many features available, including Undo, Ortho, Zoom Extend, and the ability to edit the length of a polyline after completing a polygon. Simply click on the line, and an input box will appear asking for the new length. Enter the desired length and hit enter.
Once you have finished drawing the polygon, please click the “Next” button.
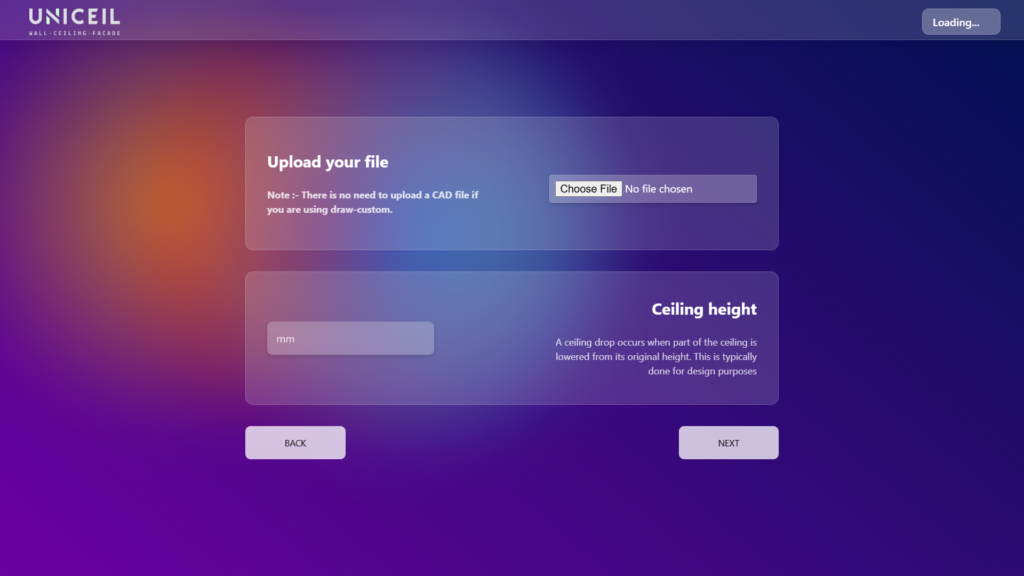
After clicking “next,” you will reach this page. Here, you only need to enter the height of the room; there is no need to upload a CAD file if you are using the draw-custom option.
Templates
This feature is currently in development.
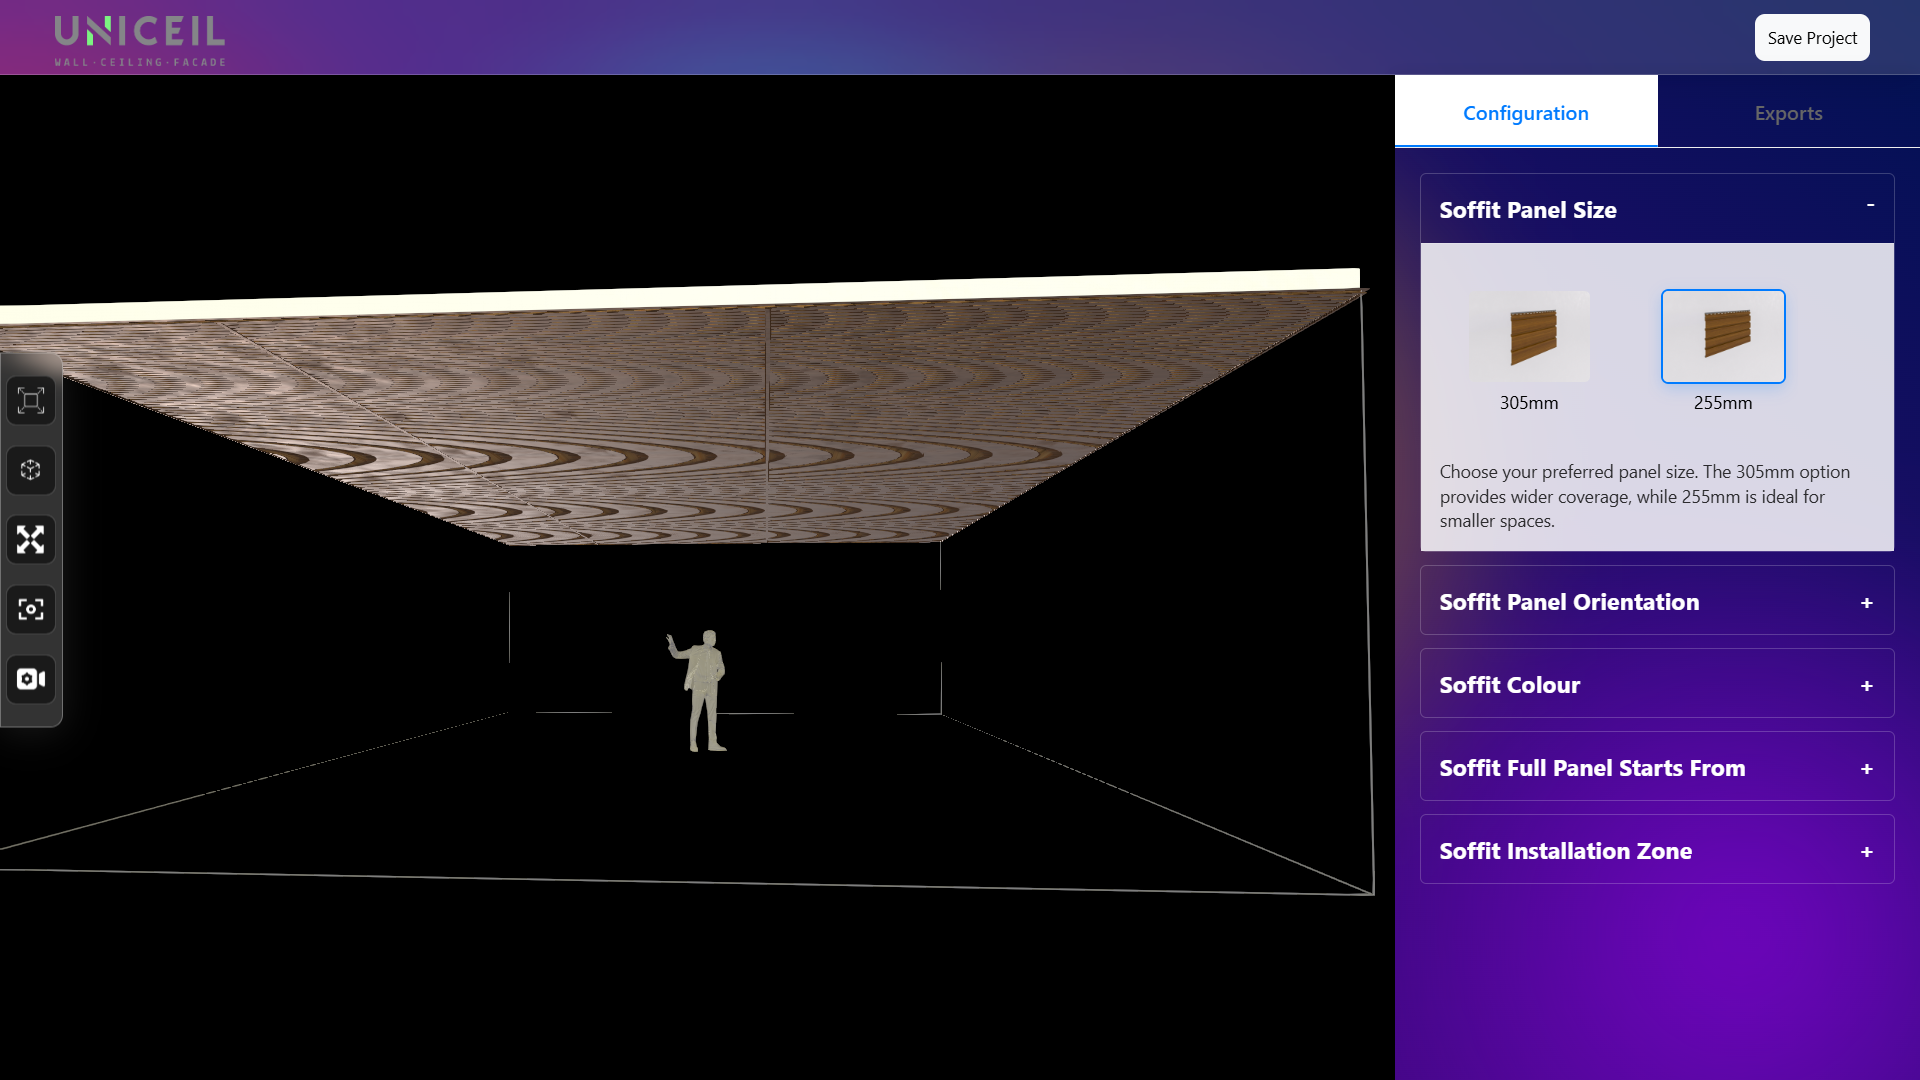
Configurator
Once you finish the draw-custom or upload CAD, you will see the 3D model in the soffit panel configurator.

On the right side of the screen, there are two options: “Configuration” and “Export.” By default, the “Configuration” tab is open. In this tab, there are five options for the model: soffit panel size, soffit panel orientation, soffit color, where the soffit full panel starts, and the soffit installation zone. You can choose each option, and each one contains sub-options for the model. You can expand an option by clicking on it.
Export Tabs
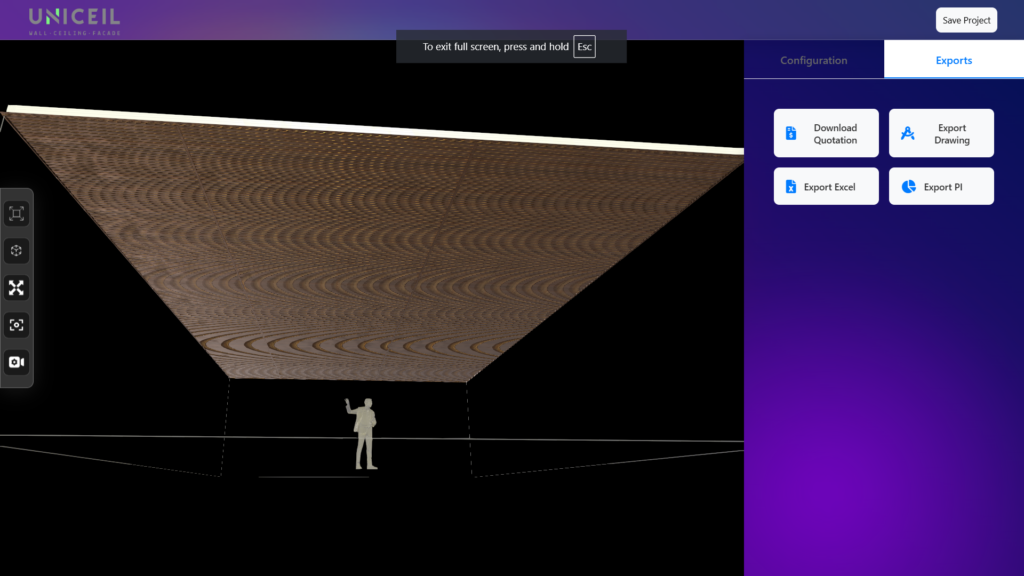
Under export tab you will get these four buttons.
Download Quotation
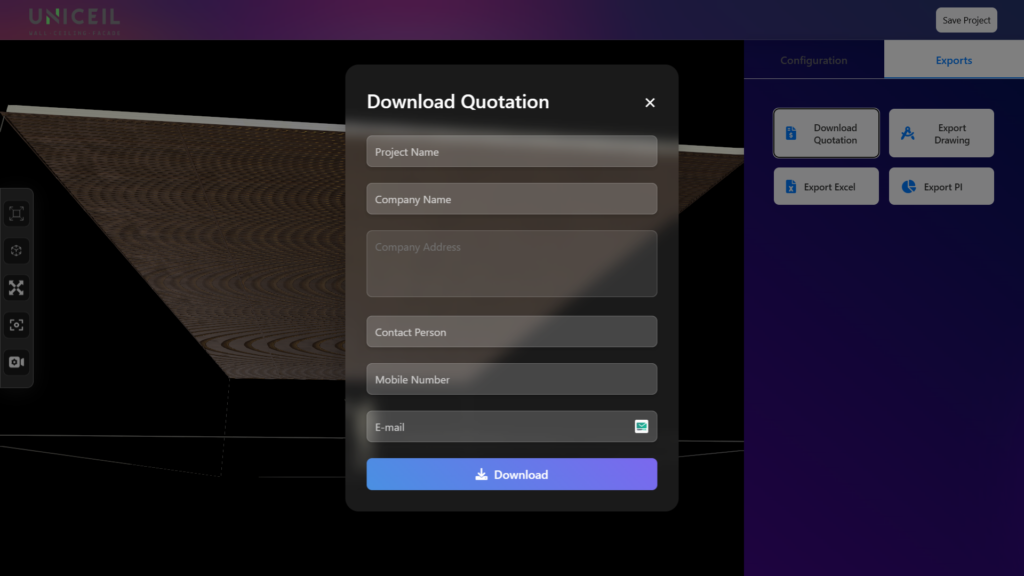
When you click on “Download Quotation,” you will see a form. After filling it out, the quotation PDF and pricing PDF of the model will start downloading.
Export PI button will start the downloading of invoice.
Export excel will start downloading the excel data of the model.
Export drawning will give you CAD file of the modal.
Save Project
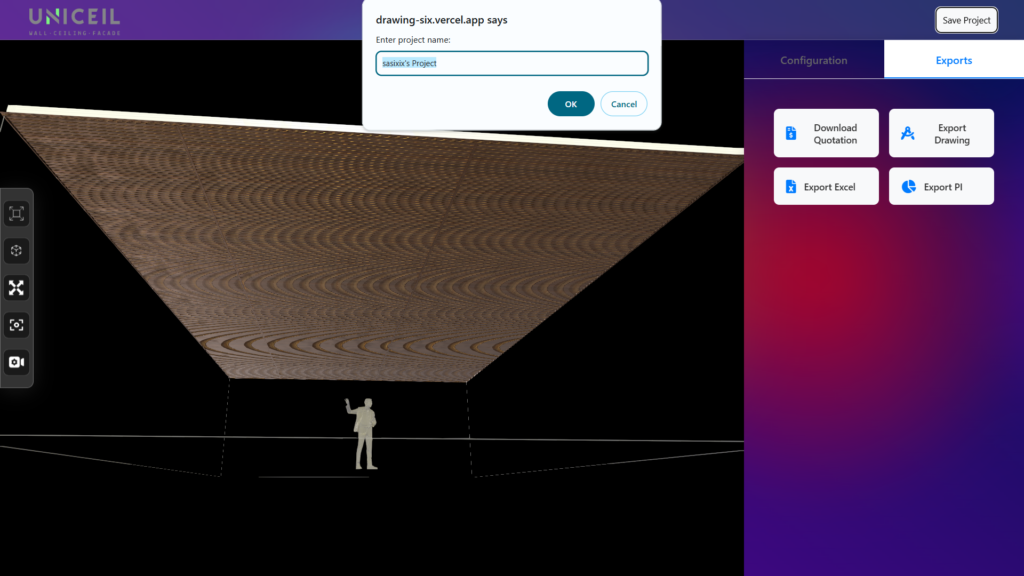
In the configurator screen, there is a save button located in the top right corner. When you click on it, you will be prompted to enter a name for your project. Once you provide a name, the project will be saved with the most recent changes you made.
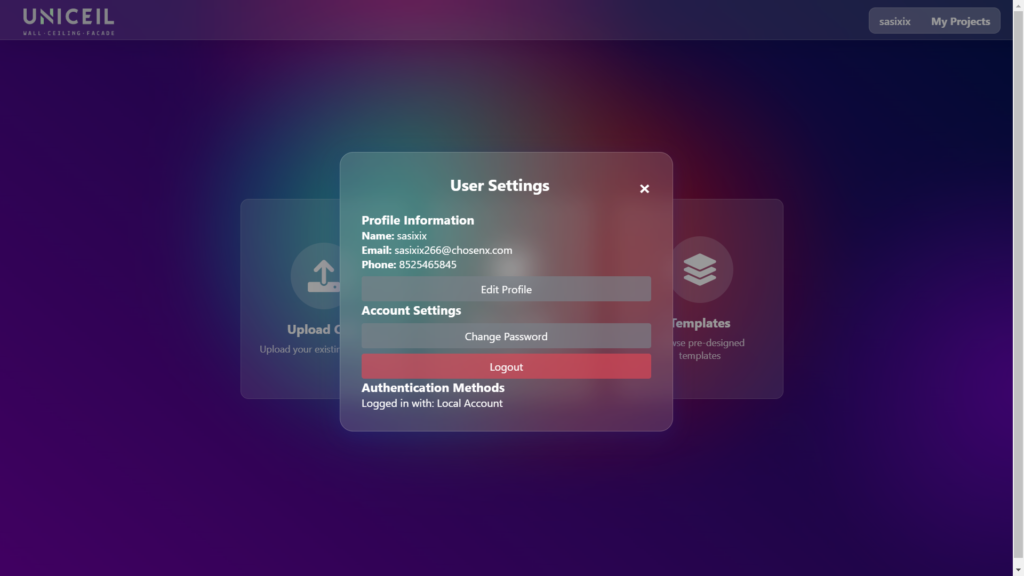
Saved Project and User settings.
When you log in with your registered email, you will see two options on the right side of the header: one is your name, and the other is “My Projects.” If you click on your name, you will have the option to change your password and log out.
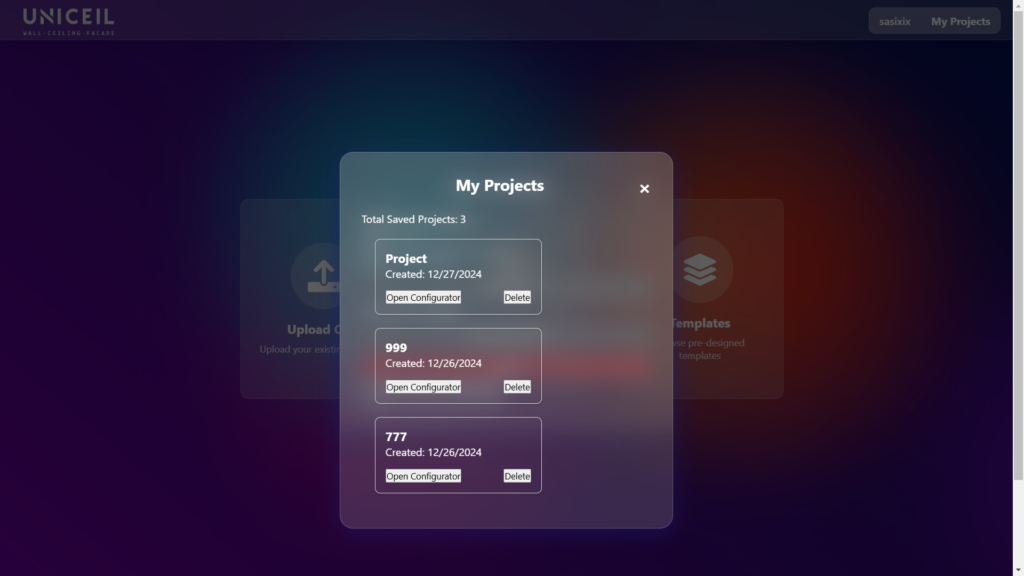
When you click on the “My Projects” option, you can view all your saved projects, delete any unwanted projects, and open the ones you need.
We will add more features to this web application, some of which are currently under development.